

Does your vehicle exhibit a noticeable decline in ride quality? A bouncy, uncontrolled motion on the highway is a classic indicator that your shock absorbers have reached the end of their service life. However, the symptoms are not always so obvious. Many are more subtle, yet they carry significant implications for your safety and the longevity of your vehicle's components.
When shocks begin to fail, the effects are often palpable from the driver's seat. Does the front of your vehicle dip excessively during braking? This phenomenon, known as "nose-diving," is a definitive sign that your front shocks are worn and can no longer effectively manage the forward weight transfer.
You may also observe the vehicle swaying or leaning during lane changes or cornering. This loss of stability occurs because compromised shock absorbers cannot adequately control body roll, making the vehicle's handling less predictable and secure.
Physical and Visual Indicators of Wear
Often, the most conclusive evidence of shock absorber failure is visible. A thorough visual inspection can reveal much about the condition of your vehicle's suspension system.
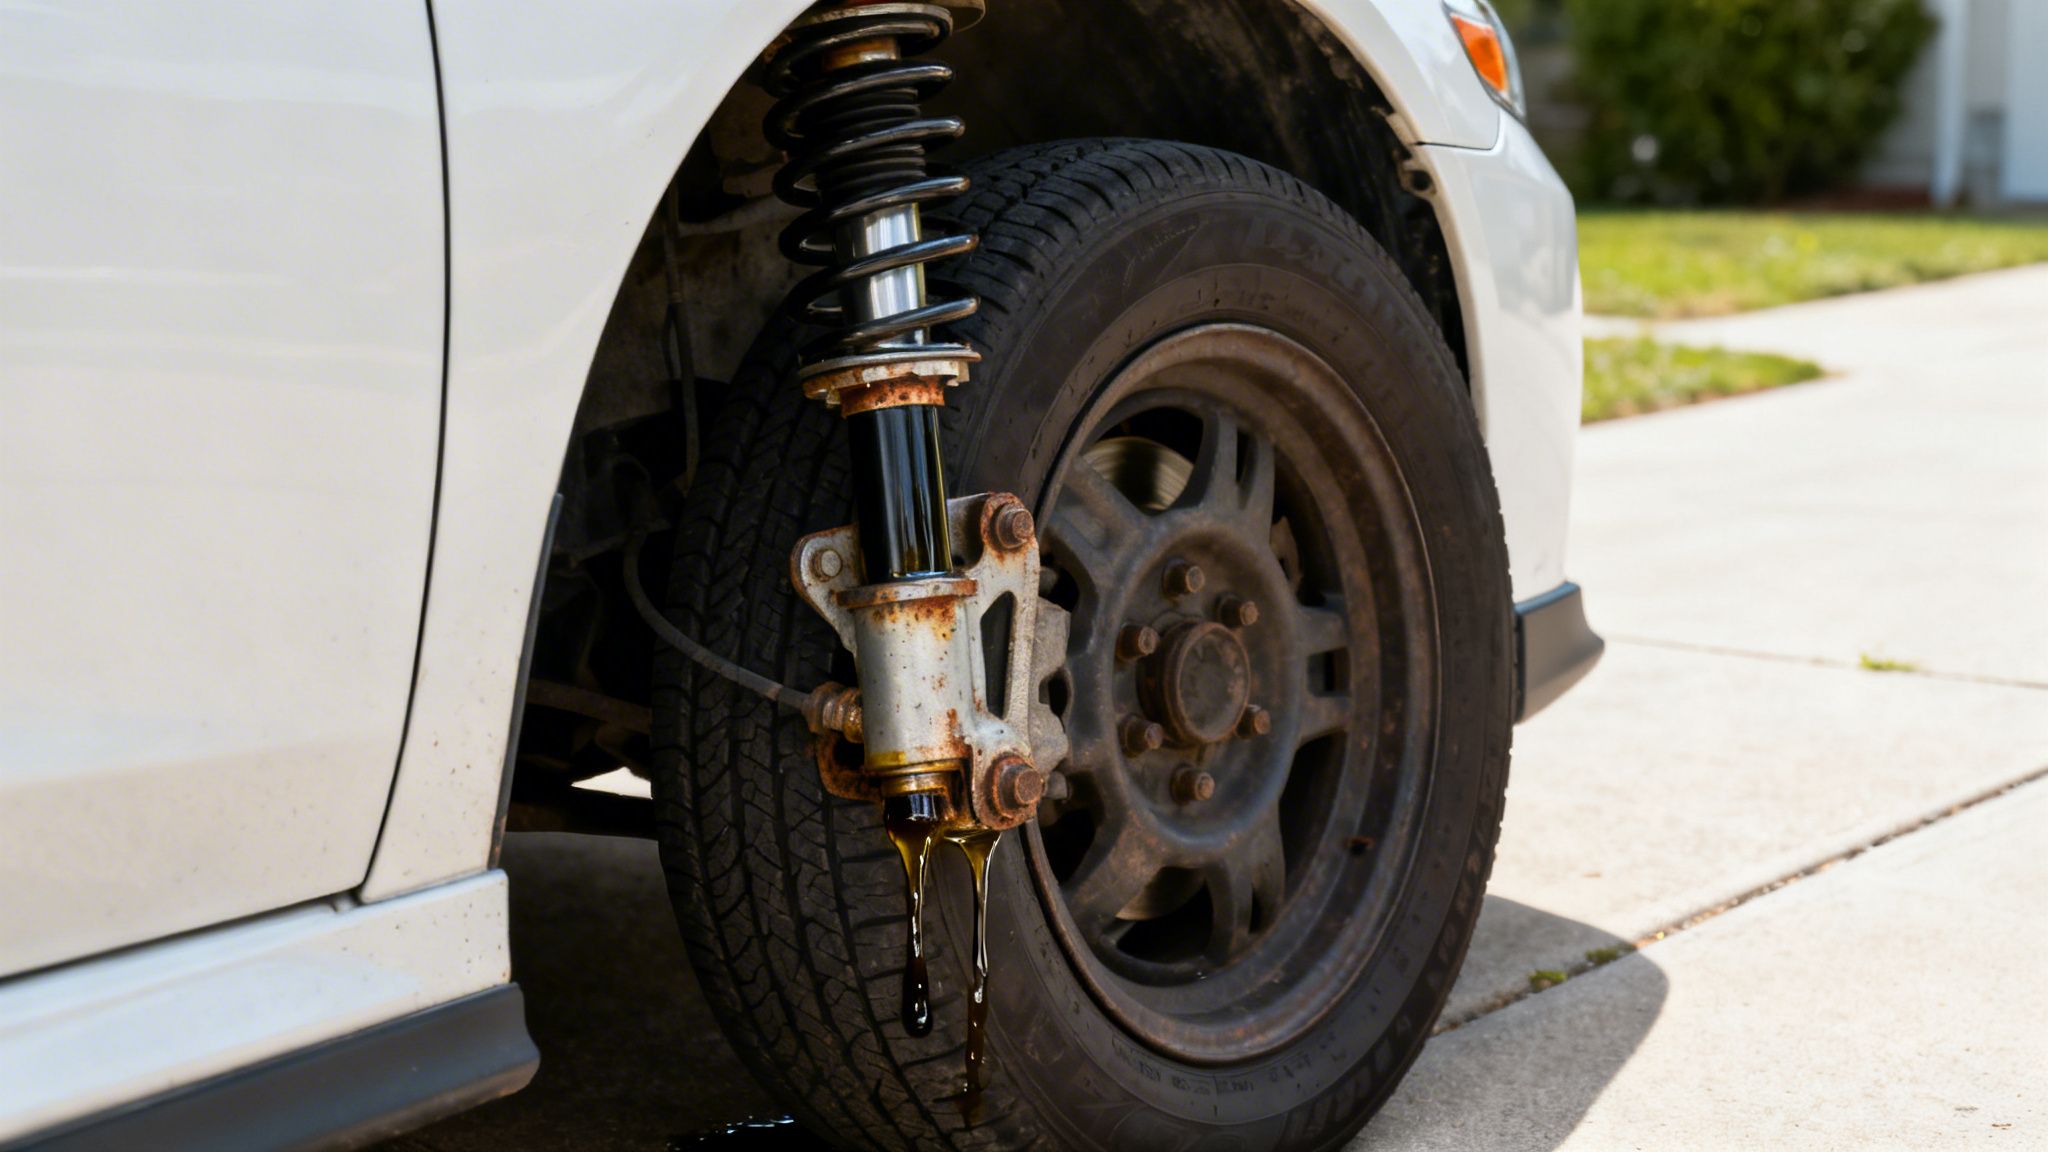
The most unambiguous sign of a failed shock absorber is a hydraulic fluid leak. Examine the area around your suspension—if you find oily or greasy residue coating the shock absorber body, replacement is necessary.
Do not overlook your tires. Worn shocks allow the tires to bounce erratically against the road surface, leading to a distinctive wear pattern known as "cupping" or "scalloping." This appears as high and low spots or divots across the tread. This type of wear not only compromises tire integrity but also serves as a direct indicator of a suspension issue.
The "Bounce Test": A Preliminary Diagnostic
You can perform a simple diagnostic test at home. Firmly press down on one corner of your vehicle and release it abruptly. If the vehicle bounces more than once or twice, the shock absorber at that corner has likely failed.
Understanding the Symptoms: A Technical Overview
Recognizing the early signs of shock absorber failure is fundamental to maintaining vehicle safety and preventing more costly repairs. This table provides a technical breakdown of the symptoms and their direct impact on vehicle dynamics and safety.
Quick Guide to Failing Shock Absorber Symptoms
| Symptom | Description of Driving Experience | Impact on Vehicle Safety |
|---|---|---|
| Bouncy or Floating Ride | The vehicle feels unstable, particularly at highway speeds, and oscillates excessively over road imperfections. | Reduces driver control and introduces ride discomfort. |
| "Nose-Diving" When Braking | The front of the vehicle pitches forward sharply upon brake application. | Significantly increases stopping distance, a critical factor in wet or emergency conditions. |
| Swaying or Leaning in Turns | The vehicle body exhibits excessive roll during cornering or lane changes. | Compromises dynamic stability and hinders the ability to perform evasive maneuvers safely. |
| Uneven Tire Wear | The presence of "cupped" or scalloped patterns on the tire tread. | Leads to diminished traction, a reduced tire lifespan, and necessitates premature tire replacement. |
| Vibrations Through the Steering Wheel | The steering wheel oscillates, especially at higher speeds on uneven road surfaces. | Indicates a loss of consistent tire contact with the road, negatively affecting steering response. |
Vigilance regarding these symptoms is crucial. A vehicle that feels "off" is often a vehicle that has become mechanically unsafe.
The Consequences of Deferring Shock Absorber Replacement
Postponing shock absorber replacement transcends comfort; it introduces significant safety risks and financial consequences.
Empirical studies demonstrate that worn shocks can increase a vehicle's stopping distance by as much as 10-20%, a risk that is amplified on wet surfaces. For any driver, this added distance can be the decisive factor between a near-miss and a collision.
Furthermore, failing shocks negatively impact your finances. They accelerate tire wear, potentially reducing tire lifespan by up to 25% due to the cupping they cause. This results in the premature and unnecessary expense of new tires.
For a more exhaustive analysis of these issues, our guide on the symptoms of bad shocks and struts offers further detail.
Procuring the Correct Tools and Components
A common pitfall in DIY automotive repair is improper preparation. A project can be quickly derailed by the absence of a single necessary tool or part. Before any disassembly begins, the most critical phase is the methodical gathering of all required tools and components.
Thorough preparation is the primary differentiator between a smooth, successful repair and a frustrating, prolonged ordeal.
Essential Tool and Equipment Checklist
While a professional-grade workshop is not required, a basic socket set is insufficient for this task. The proper equipment ensures both safety and efficiency.
- Floor Jack and Jack Stands: This is a non-negotiable safety protocol. Never position yourself under a vehicle supported solely by a jack. Utilize at least two jack stands rated appropriately for your vehicle's weight.
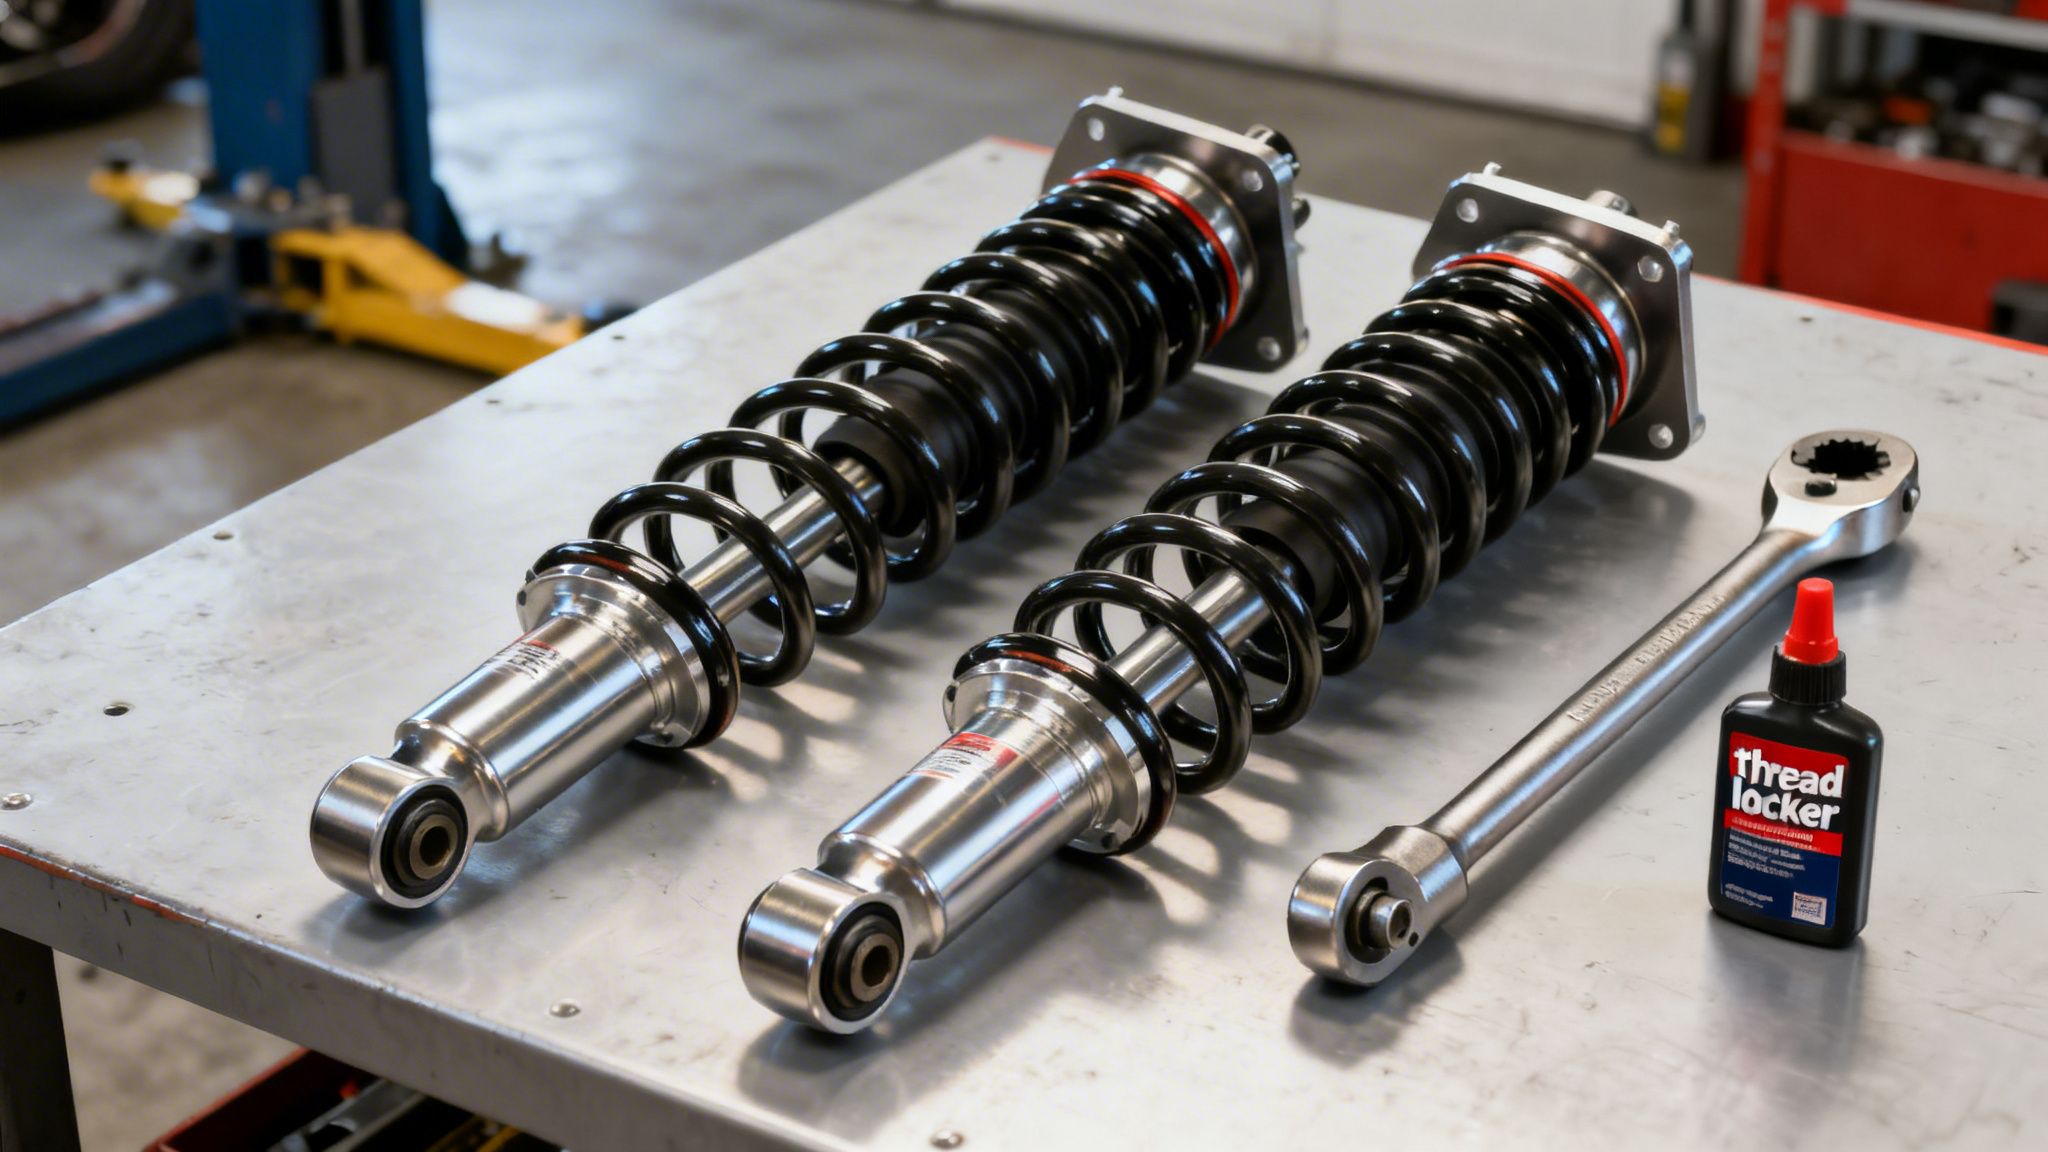
- Torque Wrench: Suspension fasteners require precise tightening to manufacturer specifications. Insufficient torque can lead to component failure, while excessive torque can strip threads or fracture bolts. A torque wrench is indispensable.
- Breaker Bar: Suspension bolts are subjected to harsh environmental conditions and often seize. A long-handled breaker bar provides the necessary leverage to break them loose safely and effectively.
- Socket and Wrench Set: A comprehensive set, typically metric for modern vehicles, is necessary. Often, one must hold a bolt head with a wrench while turning the nut with a socket, making possession of both critical.
- Penetrating Oil: This is an essential aid for dealing with corroded fasteners. Apply a liberal amount to all bolts targeted for removal and allow it to penetrate for at least 15-20 minutes. This simple action can prevent significant difficulties.
Selecting Appropriate Replacement Shock Absorbers
The automotive aftermarket is vast. The market for aftermarket shock absorbers is projected to expand by USD 1.12 billion by 2028, driven by increasing vehicle longevity. While most shocks have a service life of 50,000 to 100,000 miles, adverse road conditions can shorten this interval. You can explore this topic further in the automotive aftermarket analysis.
Your primary decision lies between OEM (Original Equipment Manufacturer) and aftermarket parts. OEM shocks replicate the vehicle's factory-installed components, guaranteeing a precise fit and the original ride characteristics. Aftermarket parts offer a wider range of options, from budget-conscious replacements to high-performance upgrades.
You will also encounter terms like "monotube" and "twin-tube." Here is a technical breakdown:
- Twin-Tube Shocks: These are the most common design, found on the majority of passenger vehicles. They provide a comfortable, balanced ride at a cost-effective price point.
- Monotube Shocks: This is a more advanced design, often utilized in trucks and performance vehicles. They offer superior heat dissipation and more consistent damping performance, making them ideal for heavy-duty applications or spirited driving.
For most daily driving applications, a quality set of twin-tube shock absorbers represents an optimal balance of cost and performance.
A Step-by-Step Guide to Removal and Installation
With your new shock absorbers and tools prepared, it is time to proceed with the replacement. This section will provide a detailed, step-by-step walkthrough of the process, emphasizing the procedural details that ensure a successful outcome. This task is achievable for a mechanically inclined individual without professional experience.
The key to success is rooted in meticulous preparation before beginning the physical work. Properly lifting the vehicle, organizing tools, and verifying parts are correct constitute the majority of the effort.

Addressing these preliminary steps systematically helps to prevent common frustrations and ensures a smooth workflow.
The Removal Process: Disassembling the Old Shocks
After the vehicle is securely supported on jack stands, remove the wheel to gain unobstructed access to the shock absorber and its mounting hardware. Most configurations consist of a lower mounting bolt and one or two upper mounting bolts.
It is at this stage that you may encounter seized or rusted fasteners.
The most effective method for dealing with frozen bolts is not brute force, but the application of penetrating oil and patience. Thoroughly spray each bolt you intend to remove and allow 15-20 minutes for the oil to work into the threads. This step is a proven time-saver.
After allowing the oil to penetrate, use a wrench on the nut and a breaker bar on the bolt head to apply controlled, high-leverage force. This technique helps break the bolt loose without stripping the fastener. It is generally advisable to begin with the lower mounting bolt before proceeding to the upper ones. Once all bolts are removed, the old shock absorber can be extracted.
Installing The New Shock Absorber
Before proceeding, meticulously compare the old shock absorber with the new one. Verify that the overall length, mounting points, and hardware are identical. Some new shocks are shipped in a compressed state with a retaining strap; if so, leave the strap in place until the shock is partially installed to simplify alignment.
Maneuver the new shock absorber into position, beginning with the upper mount. Hand-thread the bolts to temporarily secure it.
To align the bottom mount, you may need to slightly compress the shock by hand or use a floor jack to make minor adjustments to the height of the axle or control arm. A small change in position is typically all that is required to align the bolt holes. Never force a bolt into a misaligned hole.
The Critical Final Touches: Fastening and Torquing
This is the most critical phase of the installation. Improperly tightened fasteners pose a severe safety hazard. Every suspension bolt has a specific torque specification designated by the vehicle manufacturer, which must be adhered to precisely.
Using a calibrated torque wrench, tighten the upper and lower mounting bolts to the exact specification found in your vehicle's service manual. Overtightening can damage the fastener or mounting points, while under-tightening can allow the shock to loosen over time.
- Pro Tip 1: Final torque should always be applied with the vehicle's full weight loading the suspension. To achieve this, lower the vehicle onto ramps or reposition the jack stands to support the axle or control arms directly.
- Pro Tip 2: For added security, apply a small amount of medium-strength (blue) thread-locking compound to the bolt threads. This helps prevent the fasteners from vibrating loose during operation.
You may now reinstall the wheel, snug the lug nuts, and lower the vehicle completely to the ground. Once on the ground, use your torque wrench to tighten the lug nuts to their proper torque value in a star or crisscross pattern.
While this guide covers standard shock absorbers, some vehicles utilize a strut assembly, where the shock absorber and coil spring are an integrated unit. If the shock is encircled by a large coil spring, it is a strut. Learn more in our guide on how to change a strut. This procedure requires specialized tools and is generally recommended to be performed by qualified professionals.
Professional Insights: Avoiding Common Mistakes
Even with a detailed guide, several common errors can complicate a shock absorber replacement. The key to a successful DIY project is understanding not only the correct procedures but also the potential pitfalls to avoid.
Adhering to best practices will save time, prevent component damage, and ensure the resulting repair is both safe and durable.
One of the most frequent errors is estimating bolt tightness. The "good and tight" method is insufficient and hazardous. Overtightening can strip threads or fracture a bolt, while under-tightening creates a significant safety risk, as the shock could become detached during vehicle operation. The use of a torque wrench is mandatory.
Key Practices for a Successful Replacement
A fundamental rule is to always replace shock absorbers in pairs on the same axle. Replacing only one failed shock creates a dangerous imbalance in damping characteristics. The new, firm shock and the old, soft shock will cause unpredictable handling, accelerate tire wear, and can introduce new issues, such as clarifying what causes steering wheel vibration.
To ensure the longevity and safety of your repair, follow these expert recommendations:
- Always Use Thread-Locker: Applying a medium-strength (blue) thread-locking compound to bolt threads is a low-cost, high-value measure. It provides an additional layer of security against vibration-induced loosening.
- Differentiate Between Shocks and Struts: This is a critical distinction. A shock absorber is a damping device. A strut, in contrast, is a structural component of the suspension that integrates the damper and a coil spring. Strut replacement requires a spring compressor, a tool that stores immense potential energy and can be extremely dangerous if used improperly. This task is best delegated to trained professionals.
- Never Reuse Old Hardware: New shock absorbers typically include new bushings, nuts, and washers. Use these new components. Old hardware can be fatigued, stretched, or corroded, compromising the integrity of the installation.
A DIY shock absorber replacement can restore up to 90% of a vehicle's original handling characteristics. However, DIY mistakes are a notable concern, with data suggesting a 15% failure rate within the first year due to installation errors. This is in sharp contrast to a professional installation success rate exceeding 99%.
The Importance of Correct Installation
With the average vehicle age in North America now at 12.5 years, diligent suspension maintenance is more critical than ever. This trend is a major factor in the global automotive shock absorber market's projected growth to USD 38.03 billion by 2034, as aging vehicles require more service to remain safe. You can review the full analysis in the automotive shock absorber market report.
Knowing When to Consult a Professional Mechanic
There is considerable satisfaction in successfully completing your own automotive repairs, and replacing shock absorbers is a significant achievement. However, a key component of prudent DIY work is recognizing when a task exceeds your equipment or expertise. This decision is not an admission of failure but a wise choice for your vehicle's integrity, your personal safety, and your finances.
If an inspection reveals heavy, flaking corrosion on the vehicle frame or suspension components, this should be considered a major warning. A seemingly simple bolt can easily snap, transforming a two-hour job into a multi-day ordeal involving drilling, extraction, and re-threading. This is a common scenario encountered in professional repair shops.
When the Job Becomes Complex
Beyond corrosion, the complexity of modern vehicles can introduce unforeseen challenges. Many contemporary cars feature electronic or adaptive suspension systems that are integrated with the vehicle's central computer. Tampering with these systems without specialized knowledge and diagnostic tools can trigger numerous dashboard warnings or even disable critical safety functions.
Here are clear indicators that it is time to consult the ASE-certified technicians at Express Lube & Car Care:
- You Are Dealing with a Strut Assembly: If the shock absorber is housed within a large coil spring, you are working on a strut. This procedure requires a spring compressor, a tool that is inherently dangerous if it malfunctions or is used incorrectly. For safety reasons, this job should be left to professionals.
- Specialized Tools Are Required: Certain vehicles, particularly those of European manufacture, may necessitate unique sockets or pullers for shock absorber removal. A professional shop has these tools readily available, saving you the expense and delay of sourcing them.
- You Suspect Other Issues: Worn shocks are often just the most apparent symptom of a larger problem. A trained technician can perform a comprehensive inspection and identify related issues you might overlook, such as worn ball joints, tie rod ends, or control arm bushings that are also compromising vehicle performance.
Entrusting the work to a professional ensures the job is completed correctly and is typically warrantied. All components are torqued to precise factory specifications, and the entire suspension system is inspected for collateral wear. For vehicle owners who rely on their car daily, this assurance provides invaluable peace of mind.
Consider the cost-benefit analysis: while you may save on labor costs with a DIY approach, a single mistake could result in repair bills far exceeding that initial savings. When learning how to replace shock absorbers, deferring to an expert is often the most intelligent and responsible decision.
Common Questions Following Shock Absorber Replacement
Upon completing the installation and returning the vehicle to service, it is natural to have questions about the new ride characteristics. This section addresses some of the most frequent inquiries from drivers after a shock absorber replacement.
Is a Wheel Alignment Necessary?
This is the most common question. If you have only replaced the rear shock absorbers, a wheel alignment is typically not required.
However, if the old shock absorbers were worn to the point of causing uneven tire wear, a wheel alignment is a prudent investment. It ensures that the suspension geometry is correct, protecting your investment in new tires and maximizing their service life.
Why Do My New Shocks Feel Stiff?
It is perfectly normal for the ride to feel firmer immediately following installation. This is, in fact, a positive indication.
New shock absorbers require a brief break-in period, typically a few hundred miles of driving, to allow the internal components and seals to settle. The initial firmness signifies that they are functioning correctly and providing proper control over the vehicle's suspension dynamics.
What If I Hear a New Noise?
A minor squeak or clunk immediately after installation is not usually a cause for alarm. This is often the sound of new bushings and hardware settling into their operational positions.
However, if the noise is loud, persistent, or worsens over time, it warrants immediate investigation. The first step should be to re-verify that every mounting bolt has been tightened to the manufacturer's specified torque.
It is useful to remember that your suspension is an intricate system of interconnected components. For a more profound understanding of its function, learning the distinction between shocks and struts and their respective roles in ride quality is essential.
What Is the Expected Lifespan of My New Shocks?
With a quality set of new shock absorbers, you can anticipate a service life of 50,000 to 100,000 miles. This range is, of course, dependent on your driving habits and local road conditions. Practicing defensive driving and avoiding potholes will help maximize their longevity.
When it comes to your vehicle's safety and performance, there is no substitute for professional expertise. For an expert inspection or any automotive service, you can trust the ASE-certified technicians at Express Lube & Car Care. Visit our shop in Plano for service you can depend on. https://www.expresslubeplano.com