

If your serpentine belt shows cracking, glazing, fraying, or you hear a squeal on startup, replace it now rather than waiting for a breakdown. A belt that slips or snaps can take your power steering, charging system, and engine cooling with it. Many owners handle inspection themselves, but once wear is confirmed, most drivers are better served booking a professional replacement.
TL;DR:
- Most serpentine belts should be inspected around 60,000 miles and replaced between 60,000 and 100,000 miles, depending on driving conditions.
- EPDM belts tend to wear out by flattening the ribs, making visual inspection less reliable; a rib-profile gauge or technician check is recommended.
- Replacing the tensioner and pulleys alongside the belt is highly recommended to prevent early belt failure caused by worn components.
- A DIY replacement requires basic hand tools, a routing diagram, and careful attention to pulley alignment, but red flags like rough pulleys or oil contamination mean professional help is advisable.
- After installation, a quick engine test and visual belt check are crucial to ensure proper operation and prevent breakdowns.
Table of Contents
- Quick inspection checklist: symptoms and what to look for
- When to replace: mileage ranges, manufacturer guidance, and accelerating factors
- DIY vs professional: when a DIY is reasonable and when to book service
- Step-by-step DIY overview: tools and main sequence
- Tensioners, idlers and pulleys: why replacing them matters
- Time and cost expectations: DIY and shop estimates
- Safety checks and post-replacement verification
- Why we often recommend professional replacement
- Book your serpentine belt inspection or replacement
- FAQ
- Sources
Quick inspection checklist: symptoms and what to look for
You can check your serpentine belt in a few minutes with the engine off and cool. Open the hood, locate the belt along the front of the engine, and look it over with a flashlight.
- Check for glazing, a shiny, slick surface that signals heat damage and reduced grip.
- Look for fraying along the edges or visible cracks across the ribbed side.
- Feel for pilling, small rubber nodules that build up when the belt material breaks down.
- Listen for a squeal on cold start or when you turn the air conditioning on.
- Watch for a battery warning light, loss of power steering assist, or rising engine temperature.
Older neoprene belts cracked visibly as they aged, but EPDM belts, now standard on most vehicles, wear differently. EPDM belts lose material as the ribs flatten, so the rib profile shifts from a V shape to a U shape rather than showing obvious cracks. That makes a simple glance less reliable than it used to be. If you can’t tell by eye, a rib-profile gauge or a quick look by a technician settles the question.
When to replace: mileage ranges, manufacturer guidance, and accelerating factors
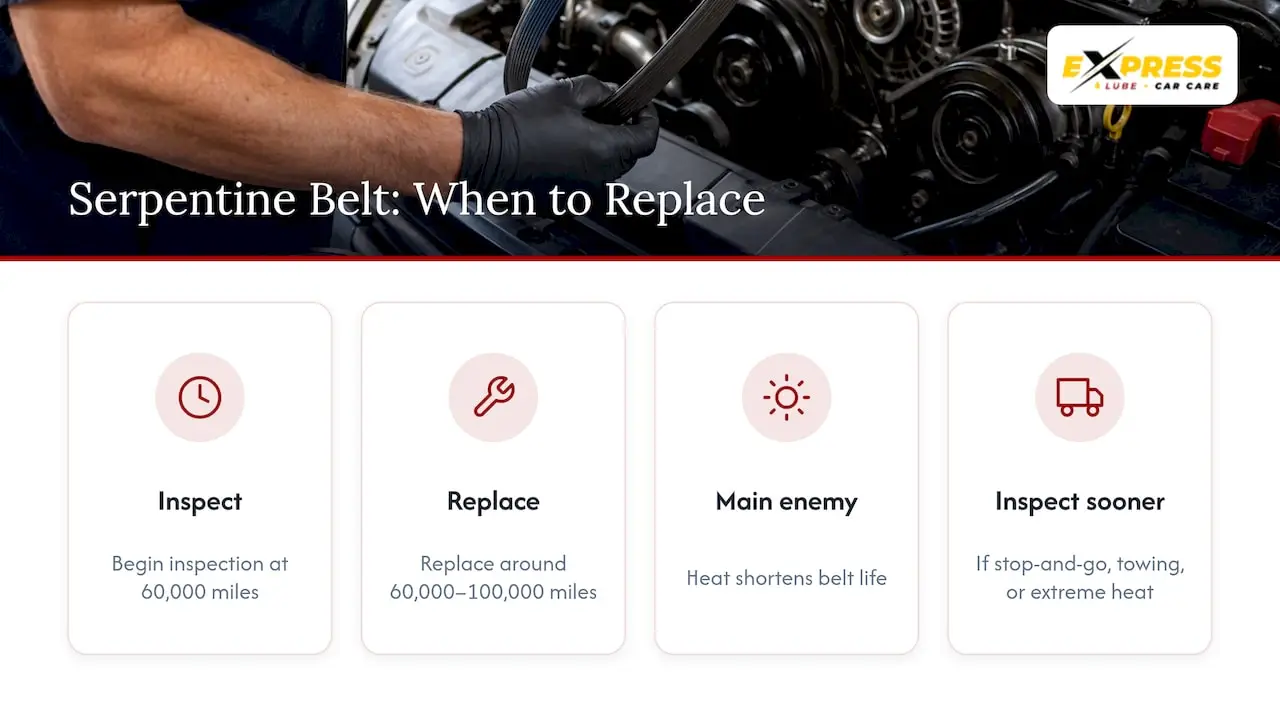
Most owners should start inspecting the serpentine belt by around 60,000 miles, with many manufacturers and industry sources recommending replacement somewhere between 60,000 and 100,000 miles depending on driving conditions and belt material. Dayco recommends replacing the belt along with the tensioner and pulleys around the mileage suggested for many vehicles for many vehicle applications, since worn support components are a common cause of early belt failure even on a belt that looks fine.
Heat is the belt’s main enemy. Engine bay temperatures, extended idling, rough roads, and oil or coolant contamination all shorten belt life faster than mileage alone suggests. Because EPDM belts hide wear so well, a conservative approach, replacing on a schedule rather than waiting for visible failure, tends to prevent more breakdowns than reactive repairs. Check your owner’s manual for the manufacturer’s specific interval, and inspect more often if you drive in stop-and-go traffic, tow regularly, or live somewhere with extreme summer heat.
DIY vs professional: when a DIY is reasonable and when to book service
A serpentine belt swap is a reasonable weekend project for an owner comfortable with basic hand tools and confident reading a routing diagram. It’s not a job that requires specialized training, but a few situations change that calculus.
- Tool and skill threshold: you’ll need a tensioner tool or breaker bar, basic sockets, and the patience to match the belt’s routing exactly before removing the old one.
- Mechanical red flags: a pulley that feels rough when spun by hand, a tensioner that won’t hold pressure, or routing that snakes around hard-to-reach brackets all point toward professional help.
- Contamination signs: an oil-soaked belt or residue near a pulley usually means a leak somewhere else that needs diagnosis before a new belt goes on.
Shops commonly recommend replacing the tensioner and idler pulleys at the same time as the belt, since a worn tensioner is a frequent cause of early comebacks and the added labor is minimal once the system is already apart.
Pro Tip: If you’re unsure whether a pulley noise is the tensioner or something else, a technician can usually diagnose it on the spot rather than guessing from a driveway.
For readers who’d rather skip the driveway entirely, Express Lube & Car Care offers no-appointment-needed service with ASE-certified technicians, which makes same-day belt inspection or replacement straightforward and easy to fit into a busy week.
Step-by-step DIY overview: tools and main sequence
Before you start, gather everything you’ll need so the job doesn’t stall halfway through.
Tools and parts checklist:
- The correct replacement belt for your make, model, and engine
- A printed or photographed routing diagram (often on a sticker under the hood)
- A tensioner tool or breaker bar sized for your tensioner bolt
- Basic socket set and ratchet
- A jack and stands if the belt path requires reaching the engine from underneath
Main sequence:
- Park on level ground, set the parking brake, and let the engine cool fully before starting.
- Photograph the current belt routing as a backup reference.
- Use the tensioner tool or breaker bar to relieve spring tension on the tensioner pulley.
- Slide the old belt off the pulleys once tension is released.
- Inspect every pulley and the tensioner arm by hand for roughness, play, or a weak spring.
- Route the new belt exactly as photographed, checking each pulley groove.
- Release the tensioner tool slowly so the belt seats under proper spring pressure.
- Verify the belt sits centered on every pulley with no edge hanging off.
Once installed, start the engine briefly and watch the belt run during a thorough test drive checklist to catch any issues Confirm the accessories, alternator, power steering, and air conditioning, all work normally, listen for unusual noise, and recheck the belt’s position after a short drive. Keep the engine off and cool throughout the job, block the vehicle securely if you raise it, and don’t attempt a timing belt or any internal timing-related task unless you have specific training. That’s a different job entirely and mistakes there can bend valves.
Tensioners, idlers and pulleys: why replacing them matters
The automatic tensioner keeps constant pressure on the belt using an internal spring, while idler pulleys just guide the belt around tight corners. Both wear out from the same heat and mileage that age the belt itself.
- A tensioner with a weak spring lets the belt slip under load, even if the belt itself is new.
- Rough or noisy bearings in an idler pulley often show up as a grinding or chirping sound.
- Misalignment between pulleys can wear a new belt’s edge prematurely.
Because a failing tensioner or idler can ruin a brand-new belt within months, replacing these parts alongside the belt reduces comebacks and is widely treated as standard practice rather than an upsell.
Time and cost expectations: DIY and shop estimates
A straightforward DIY belt swap typically takes less than an hour on vehicles with easy engine-bay access, though tight routing or components tucked behind other parts can stretch that considerably. Shops often complete the same job faster since they’re familiar with vehicle-specific routing and commonly replace the tensioner and pulleys in the same visit to avoid a return trip. Cost depends mainly on parts quality, local labor rates, and whatever else the inspection turns up, a glazed belt sometimes points to a deeper pulley or bracket issue. Whichever route you choose, ask for a parts list and an estimate before work begins so there are no surprises.
Safety checks and post-replacement verification
Once the new belt is on, run a quick confirmation before trusting it on the road.
- Start the engine and confirm the alternator, power steering, and A/C all engage normally.
- Listen for squealing, chirping, or rattling that wasn’t there before.
- Watch the belt track straight on every pulley with no wandering.
- Take a short test drive and check for stable engine temperature, normal steering feel, and no dashboard warning lights.
If anything feels off, return for a follow-up inspection. A photo-documented inspection makes it easier to compare before-and-after conditions if a problem resurfaces.
Why we often recommend professional replacement
We use ASE-certified technicians and document every inspection with photos and notes, which matters most when routing is complex or a tensioner looks questionable on sight. With no-appointment-needed service, belt checks or replacements can often be done the same day you notice a problem. When a pulley is seized, access is tight, or a component behind the belt may be failing, we provide clear information rather than a quick fix.
— Express Lube & Car Care
Book your serpentine belt inspection or replacement
A belt that’s already glazed or cracked won’t improve with time, and catching it early is simpler and less disruptive than dealing with a snapped belt on the highway. We offer no-appointment-needed service with ASE-certified technicians, so you can stop by when it fits your schedule rather than waiting days for a slot.
- Walk in without an appointment for a same-day belt inspection.
- Ask about replacing the tensioner and idler pulleys in the same visit if they’re worn.
- Review our full list of services to see what else we cover during your visit.
Ready to get it checked? Schedule your visit today and drive with one less thing to worry about.
FAQ
How do I know if my serpentine belt needs replacing?
Look for glazing, cracking, fraying, or pilling on the belt’s surface, along with squealing on startup or a loss of power steering assist. EPDM belts wear from a V-shaped rib profile to a U shape rather than cracking visibly, so a flattened rib pattern is a reliable sign even without obvious damage.
How often should a serpentine belt be replaced?
Most manufacturers recommend inspecting the belt by around 60,000 miles, with replacement commonly falling between 60,000 and 100,000 miles depending on driving conditions. Severe heat, heavy idling, or rough roads can shorten that interval, so checking your owner’s manual for your specific vehicle is worthwhile.
Can I replace a serpentine belt myself?
Yes, a serpentine belt swap is a reasonable DIY job if you have a tensioner tool, basic sockets, and a routing diagram for your engine. If a pulley feels rough, the tensioner won’t hold pressure, or routing is unusually tight, it’s worth having a technician handle it instead.
Should I replace the tensioner and pulleys with the belt?
Replacing the tensioner and idler pulleys alongside the belt is widely recommended since a weak tensioner spring or rough pulley bearing can wear out a brand-new belt quickly. Doing both at once, while the system is already apart, typically prevents a repeat repair soon after.
What happens if a serpentine belt breaks while driving?
Since the serpentine belt powers the alternator, power steering, and often the cooling system, a sudden failure can disable several of these at once. You may lose steering assist and see the engine temperature climb quickly, so pulling over safely as soon as you notice a warning light or unusual noise is important.
Sources
- Serpentine belt inspection — Dayco TechHub
- The serpentine belt: one belt to rule them all — AAA Automotive