

Before attempting to replace your car's thermostat, it's essential to confirm that the thermostat is indeed the source of the problem. Misdiagnosing a cooling system issue is a common mistake that can lead to unnecessary expense and effort.
Understanding Thermostat Failure: Is It the Real Issue?
Let's begin with a diagnosis. Your car’s thermostat is a fundamental component of the cooling system. It is a spring-loaded valve designed to regulate the flow of coolant. When the engine is cold, it remains closed to facilitate a rapid warm-up. Upon reaching a predetermined operating temperature, it opens, allowing coolant to circulate through the radiator and dissipate heat.
When a thermostat fails, it typically becomes stuck in either the open or closed position. Each failure mode presents a distinct set of symptoms. Understanding these is key to an accurate diagnosis.
Diagnostic Chart for Thermostat Symptoms
This chart will help you determine if your thermostat is stuck open, stuck closed, or failing intermittently based on observable symptoms.
| Symptom | Stuck Closed (Causes Overheating) | Stuck Open (Causes Under-heating) | Explanation |
|---|---|---|---|
| Temperature Gauge | Rises to the RED zone rapidly | Fails to reach normal operating temperature | Indicates a failure in engine temperature regulation. |
| Heater Performance | May work briefly, then fails | Produces lukewarm or cold air | The heater core relies on hot coolant to function. |
| Fuel Economy | Not a primary symptom; overheating is the main concern | Noticeable decrease in mileage | The engine operates inefficiently below its optimal temperature. |
| Check Engine Light | Possible due to overheating codes | Often triggers code P0128 | The Engine Control Unit (ECU) detects a temperature regulation anomaly. |
| Coolant Behavior | May boil, produce steam, or leak from the reservoir | No obvious external signs | Extreme pressure from boiling can rupture seals and hoses. |
Recognizing these failure modes enables a more precise diagnosis than guesswork alone.
Indicators of a Stuck-Closed Thermostat
A thermostat that is stuck in the closed position is a critical issue. It prevents coolant from reaching the radiator, trapping heat within the engine. This leads to rapid overheating, which can cause severe and costly engine damage.
The most significant indicator is a temperature gauge that climbs into the red zone, typically within 5 to 15 minutes of starting the engine. You may also observe steam from under the hood or hear the sound of coolant boiling in the reservoir tank.
Be aware of these additional signs:
- Gurgling or rumbling noises from the engine as coolant begins to boil.
- A "hot engine" or temperature warning light on your dashboard.
- Puddles or drips of coolant under the car, as high pressure forces fluid past seals.
Safety Advisory: If your vehicle is overheating, pull over safely and turn off the engine immediately. Continuing to drive can lead to a warped cylinder head or a blown head gasket, transforming a minor repair into a catastrophic engine failure.
Symptoms of a Stuck-Open Thermostat
When a thermostat is stuck open, coolant flows continuously to the radiator. While less immediately catastrophic than overheating, this prevents the engine from reaching its designed operating temperature, leading to a different set of issues.
The most common symptom is a temperature gauge that never reaches the normal midpoint, even after extended driving. This under-heating condition can cause several problems.
Look for these symptoms of a stuck-open thermostat:
- The heater blows cool or lukewarm air. This is a clear indicator. The heater requires hot coolant to warm the cabin; if the engine remains cool, so will the air from your vents.
- A sudden decrease in fuel efficiency (MPG). Engines running below their optimal temperature are less efficient. The ECU compensates by enriching the fuel mixture, increasing fuel consumption.
- The check engine light may illuminate. This is often accompanied by a Diagnostic Trouble Code (DTC) such as P0128, which indicates that the coolant temperature is remaining below the target threshold.
Overheating can stem from various causes. For a comprehensive overview, consult our guide on what causes overheating in cars to ensure you have correctly identified the problem.
Preparing Your Tools and Parts for the Replacement
Experienced mechanics will attest that thorough preparation is the key to a successful repair. Having all necessary parts and tools readily available beforehand is the difference between a frustrating endeavor and an efficient project.
Proper preparation minimizes interruptions and allows you to focus on performing the task correctly, which helps prevent mistakes that could lead to larger issues.
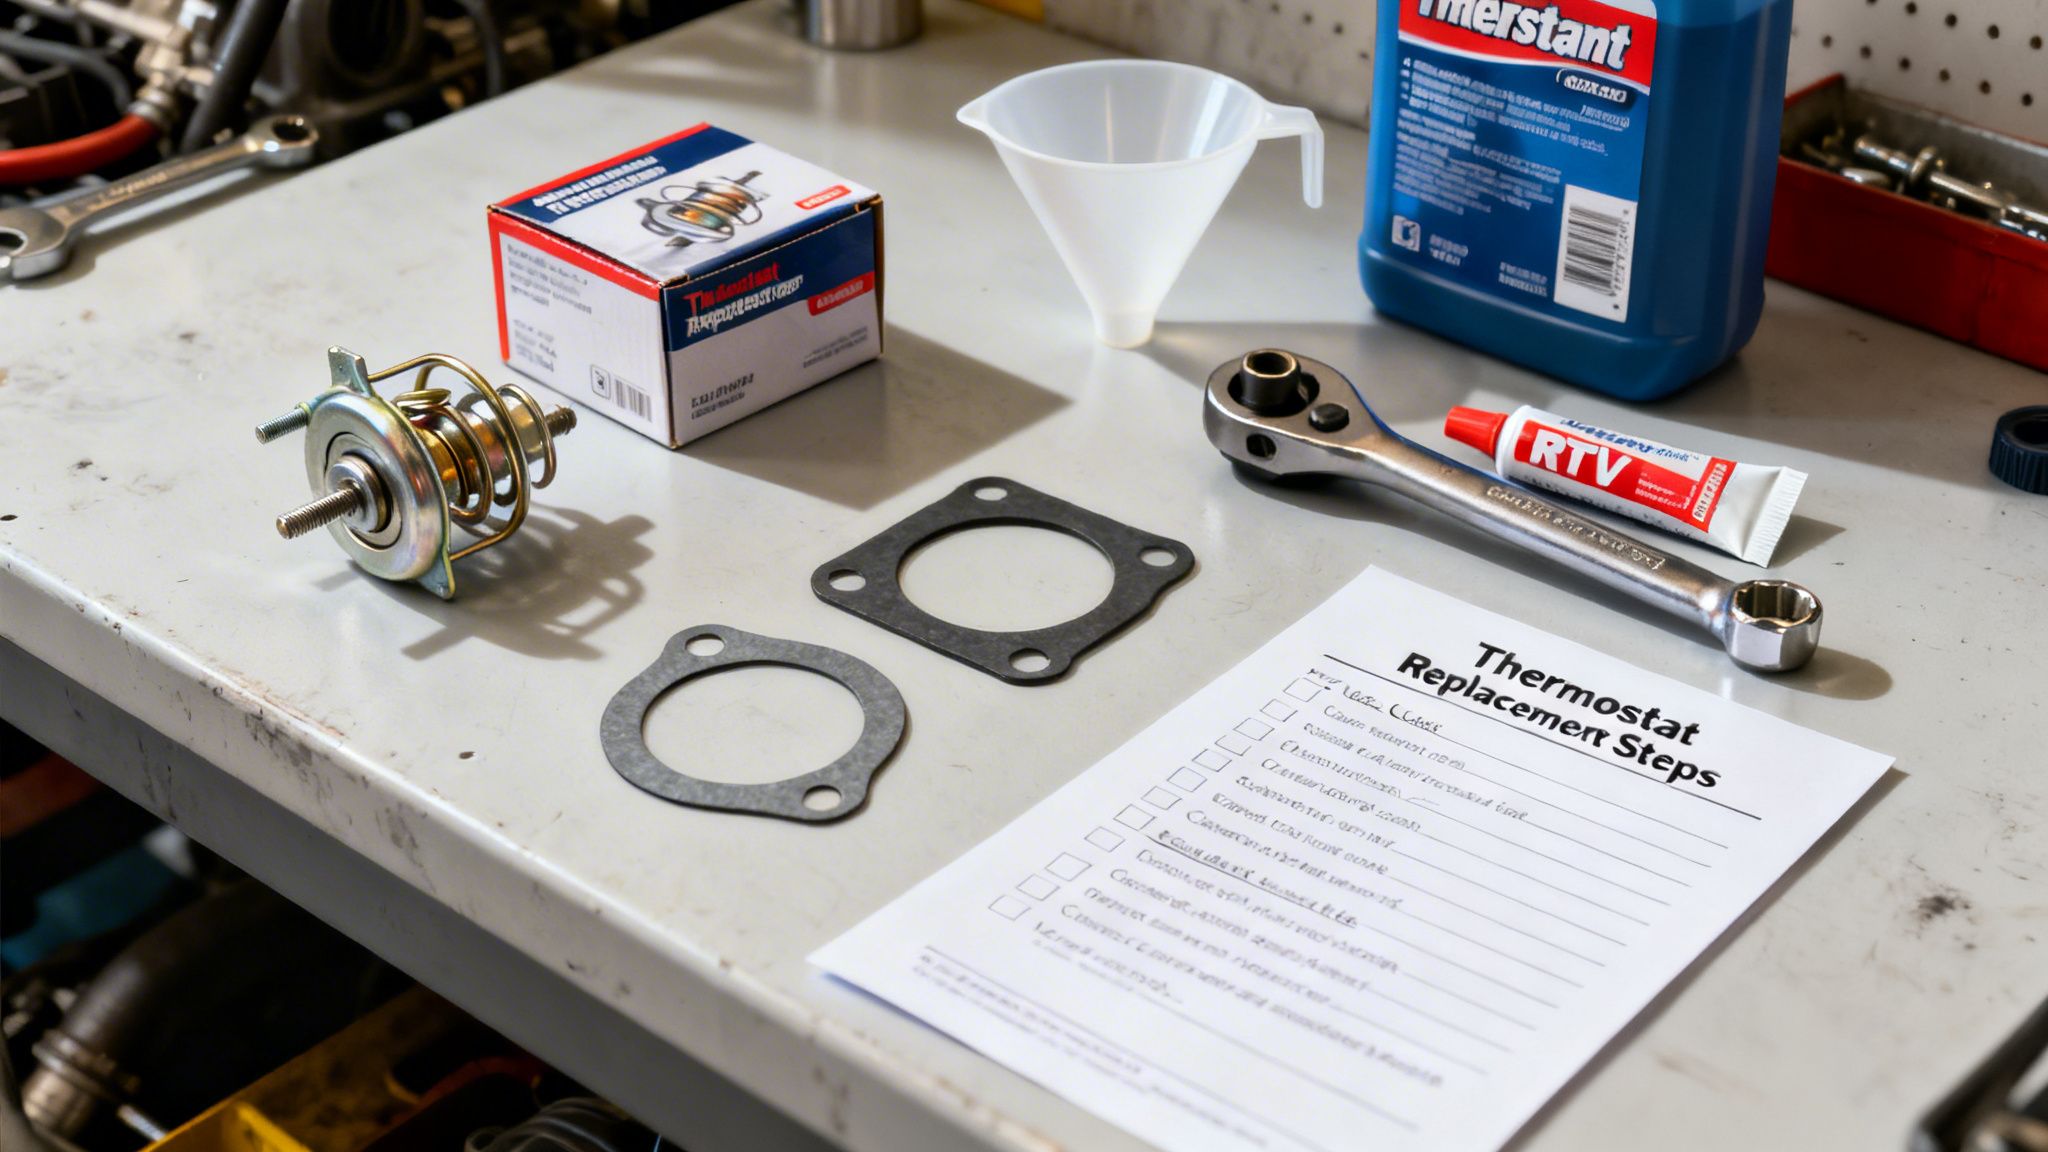
Essential Parts Checklist
First, assemble the required parts. This is not an area for compromise; using low-quality components may result in leaks or premature failure.
- New Thermostat: This is the primary component. Select an OEM-quality thermostat or one from a reputable aftermarket brand. It is crucial to verify that it has the correct temperature rating for your engine, which can be found in your owner's manual or confirmed with a dealership using your VIN.
- Gasket or Sealant: A perfect seal for the thermostat housing is essential to prevent coolant leaks. Some thermostats include a rubber O-ring or paper gasket. If not, acquire a tube of RTV (Room Temperature Vulcanizing) silicone sealant specifically formulated for high-temperature, coolant-resistant applications.
- Correct Coolant: This is a critical detail. Coolants are not universal, and using the wrong type can lead to corrosion and system damage. Your vehicle requires a specific formulation (e.g., HOAT, OAT, or IAT) and color. Refer to your manual and purchase a sufficient quantity to refill the system.
If you are unfamiliar with coolant types, our guide explaining the difference between antifreeze versus coolant provides valuable information.
Essential Tools for the Task
With your parts organized, it is time to gather your tools. Most of these may already be in your tool collection, but a few specialized items can significantly streamline the process.
A common error is attempting to use an inappropriate tool. For example, using adjustable pliers on a housing bolt can round off the head, complicating a simple task significantly.
Here is a practical list of tools you should have on hand:
- Socket Set and Ratchet: A standard metric socket set, typically from 8mm to 19mm, will be needed for the thermostat housing bolts and other components.
- Drain Pan: A clean pan with a capacity of at least two gallons is necessary to collect the old coolant during the draining process.
- Scraper or Razor Blade: This is used to meticulously remove all remnants of the old gasket or sealant from the housing's mating surfaces. A plastic scraper is recommended to avoid damaging soft aluminum components.
- Spill-Free Funnel: This tool is highly recommended. It attaches securely to your radiator or coolant reservoir, allowing you to refill the system without spills and making it easier to bleed air from the system.
- Pliers and Screwdrivers: A pair of slip-joint pliers is essential for removing spring-type hose clamps. It is also wise to have various flathead and Phillips screwdrivers available.
Preparing Your Vehicle for a Safe Repair
Embarking on a vehicle repair is rewarding, but safety must be the top priority. Before beginning any work, it is imperative to prepare your vehicle and workspace properly.
These steps are not mere suggestions; they are crucial for preventing burns, electrical damage, or serious injury, especially if working under the vehicle. Take the time to set up correctly.
Ensure the Engine is Completely Cool
This is a non-negotiable safety measure. A vehicle's cooling system operates under pressure, with coolant temperatures that can exceed 200°F (93°C). Opening a hot system will result in a violent eruption of scalding coolant and steam.
To ensure safety, you must wait until the engine is completely cool to the touch. This typically requires letting the vehicle sit for at least 3-4 hours; leaving it overnight is the safest practice. Do not rely on the dashboard temperature gauge; physically touch the engine block to confirm it is cool.
Personal experience from professionals confirms the danger. Impatiently opening a radiator cap on a warm engine can cause second-degree burns. This is a painful and avoidable mistake.
Prevent Electrical Hazards
Although this repair is primarily mechanical, disconnecting the battery is a wise precaution. It eliminates the risk of accidentally shorting an electrical component with a tool. It also prevents the electric cooling fans from activating unexpectedly, which can occur on some vehicles even with the ignition off.
The process is simple:
- Use a wrench (often 10mm) to loosen the nut on the negative (-) battery terminal.
- Remove the cable clamp from the terminal post and position it so it cannot make accidental contact.
- Only the negative terminal needs to be disconnected.
Secure the Vehicle and Contain Coolant
Depending on your vehicle's design, you may need to access the radiator drain plug from underneath. If so, you must never work under a vehicle supported only by a jack. Jacks are designed for lifting, not for sustained support, and can fail suddenly.
Always use jack stands:
- Park the vehicle on a hard, level surface such as concrete.
- Use a floor jack to lift the vehicle at a manufacturer-specified jacking point.
- Position jack stands under a solid part of the vehicle's frame.
- Slowly lower the vehicle onto the stands and verify its stability before working underneath.
Finally, place a clean drain pan under the radiator. You will either open the drain valve (petcock) or disconnect the lower radiator hose. A pan with at least a two-gallon capacity is recommended to contain the old coolant for proper disposal.
A Practical Guide to Replacing Your Thermostat
With preparations complete, we can proceed with the replacement. This section will guide you through locating the housing, removing the old thermostat, and installing the new part correctly.
Patience is your most valuable tool at this stage. Rushing can lead to coolant leaks. Proceed methodically and follow each step carefully.
Before you begin, ensure you have completed these three safety preparations.
These steps—a cool engine, a disconnected battery, and a securely supported vehicle—are foundational for a safe and successful repair.
Locating the Thermostat Housing
First, you must identify the thermostat's location. It is housed within the thermostat housing, a metal component bolted to the engine. The most straightforward way to find it is by tracing the upper radiator hose.
For most Inline-4 engines: This is typically simple. Open the hood, locate the large rubber hose at the top of the radiator, and follow it to where it connects to the engine. This connection point is the thermostat housing.
For V6 or V8 engines: The housing may be less accessible. It is often in the same location—at the end of the upper radiator hose—but you may need to remove a plastic engine cover or an air intake duct for clear access.
A small number of vehicles place the thermostat on the lower radiator hose connection. If you are uncertain, an internet search for your vehicle's year, make, and model (e.g., "2015 Honda Accord thermostat location") will provide specific guidance.
Draining a Portion of the Coolant
With your drain pan in position, it's time to drain some coolant. It is not necessary to drain the entire system—only enough to lower the coolant level below the thermostat housing. This prevents a large spill.
There are two common methods for draining coolant:
- Use the Radiator Petcock: Many radiators have a small plastic drain valve (petcock) at the bottom. Turn it counter-clockwise by hand or with pliers to drain about a gallon of coolant, then retighten it.
- Disconnect the Lower Radiator Hose: If your radiator lacks a petcock or it is seized, this is an alternative. Squeeze the hose clamp on the lower radiator hose, slide it down the hose, and then carefully work the hose off the radiator outlet. This method is faster but can be messier.
Technical Tip: Ensure the engine is completely cold, then remove the radiator cap before draining. This allows air to enter the system, which facilitates a smoother, faster flow of coolant.
Removing the Old Thermostat
Once the coolant level is below the housing, you can proceed with unbolting it. Use a socket wrench to loosen the bolts. Apply steady pressure, as they can be tight. It is good practice to break all bolts loose before fully removing any single one.
The housing may adhere to the engine due to the old gasket. A few gentle taps with a rubber mallet or careful prying with a flathead screwdriver should break the seal. Exercise caution to avoid gouging the metal surfaces.
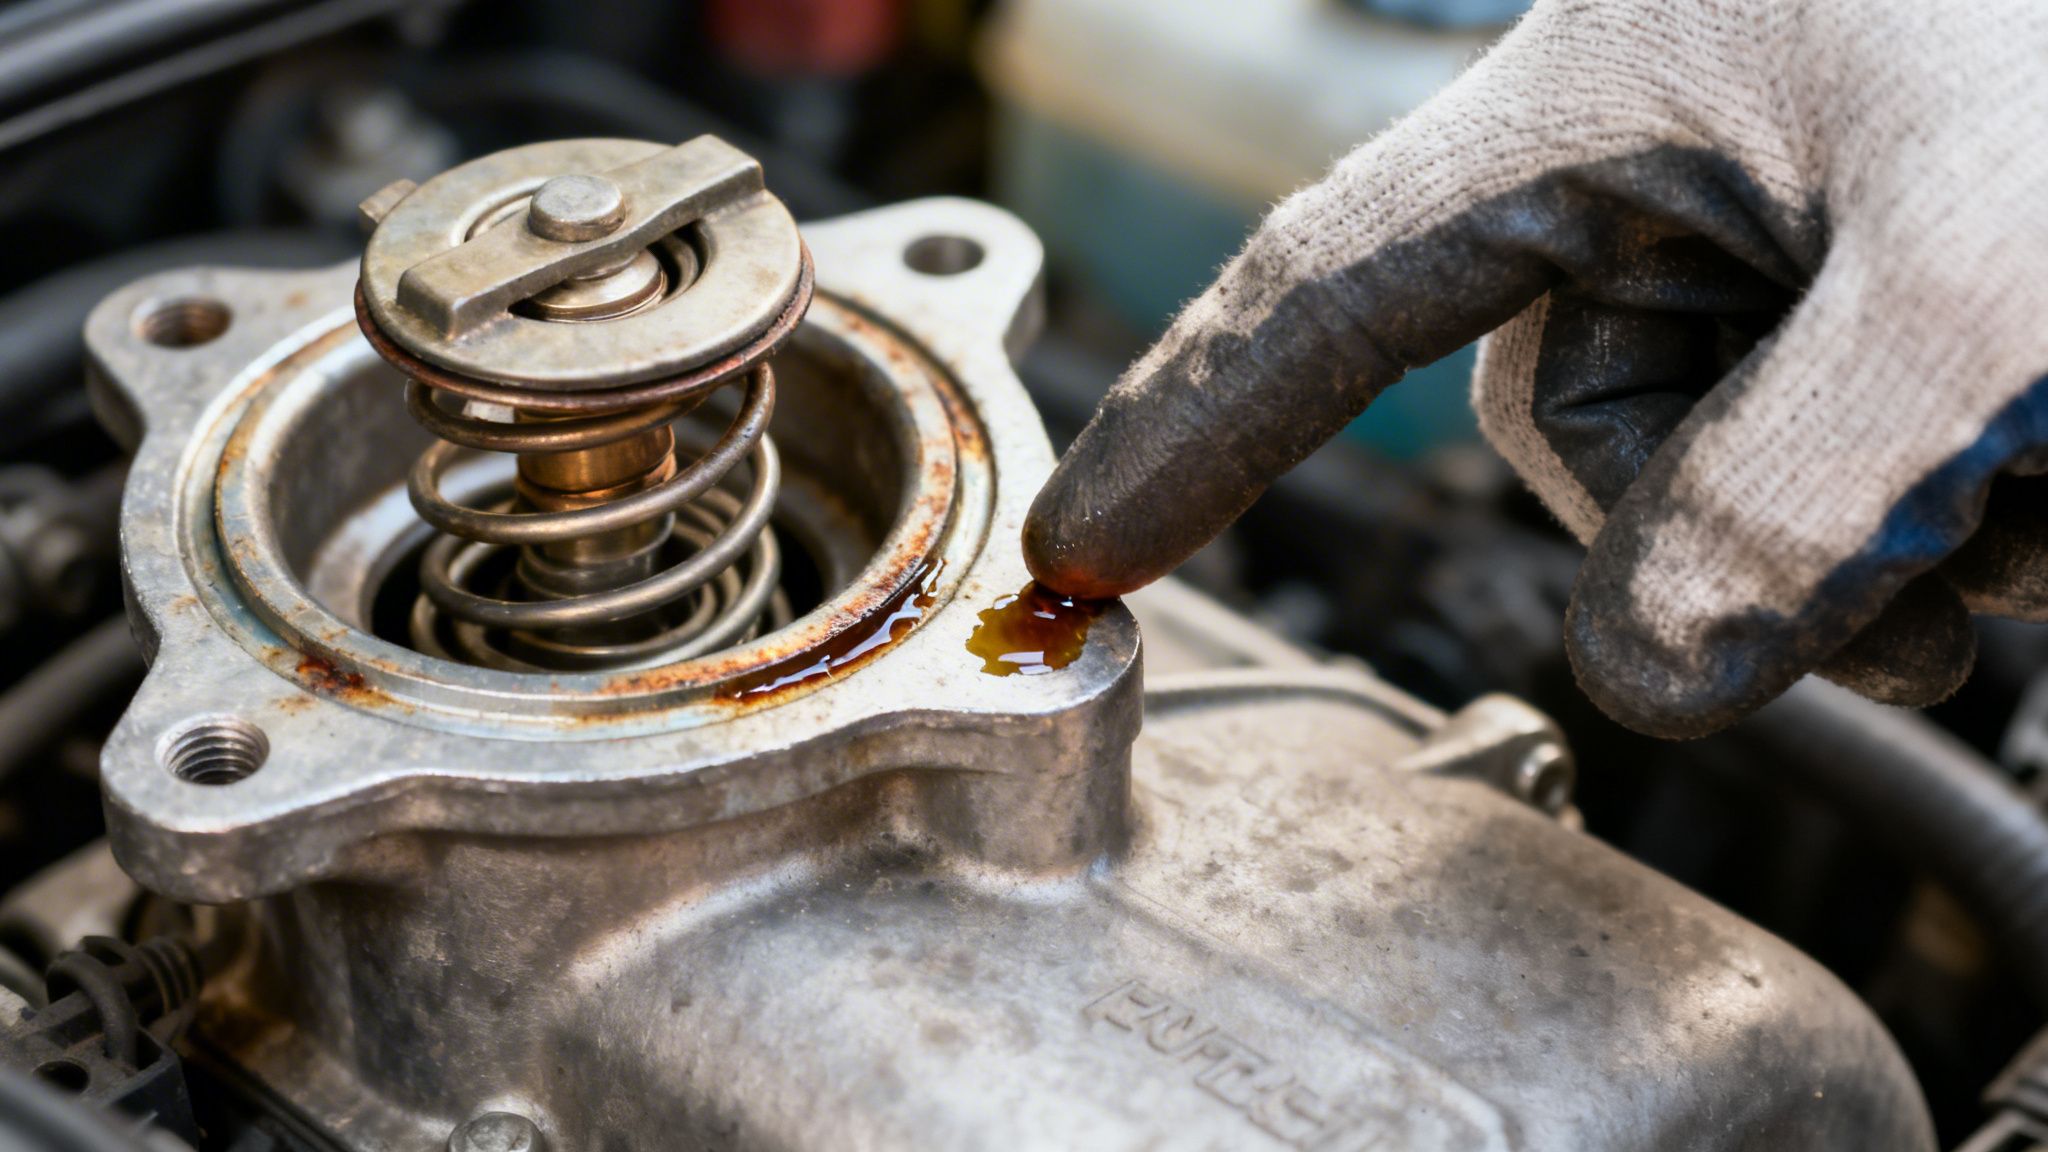
Lift the housing away to reveal the old thermostat. Before removing it, note its orientation. Pay close attention to its direction and the position of the jiggle valve—a small pin or rivet on its flange. This valve allows trapped air to escape and almost always must be installed in the uppermost position (12 o'clock).
Cleaning the Mating Surfaces
This is one of the most critical steps for ensuring a leak-free seal. Any residue from the old gasket or sealant will compromise the new seal and likely cause a leak.
Use a plastic scraper or a carefully held razor blade to clean both mating surfaces—the one on the engine and the one on the thermostat housing. The goal is to achieve a perfectly smooth, clean, and shiny finish.
- Wipe both surfaces with a clean cloth and brake cleaner to remove any remaining oil or grime.
- While scraping, place a clean rag into the engine's coolant passage to prevent debris from falling inside.
Installing the New Thermostat and Gasket
Now, reassemble the components. Place the new thermostat into its recess, ensuring it is oriented exactly as the old one was. Remember to position the jiggle valve at the top.
Next, install the new gasket.
- Rubber O-ring gasket: This is the simplest type. Fit it into the groove on the thermostat or in the housing.
- Paper or composite gasket: These can often be installed dry. For added assurance, some technicians apply a very thin layer of RTV sealant to both sides.
- Using only RTV sealant: Apply a thin, continuous bead (approximately 1/8 inch wide) around the housing's sealing surface. Be sure the bead goes inside the bolt holes, not across them.
Carefully place the housing back onto the engine, ensuring the thermostat and gasket remain properly seated. Hand-tighten the bolts first to avoid cross-threading, then tighten them incrementally in a crisscross pattern to distribute pressure evenly. Tighten them to be snug, but do not overtighten. Reconnect the radiator hose before proceeding to the final steps.
The Final Stretch: Refilling and Verifying Your Work
The new thermostat is installed, but the job is not yet complete. The following steps are as crucial as the replacement itself for preventing the very overheating issues you are trying to solve.
The cooling system must be refilled and all air bubbles must be purged. A trapped air pocket can create a blockage, impeding coolant flow and causing localized overheating. This final quality check ensures your work is successful.
Refilling the Cooling System
It is now time to refill the coolant. Using a spill-free funnel is highly recommended for this procedure, as it simplifies the process and is invaluable for bleeding air from the system.
Insert the funnel into the radiator cap opening or coolant reservoir. Begin pouring your fresh, vehicle-specific coolant. Fill until the level in the funnel is about halfway and remains stable. You will observe bubbles rising as the fluid displaces air in the system.
Important Note: It is tempting to reuse the old coolant to save money, but this is not advisable. Used coolant loses its anti-corrosion properties and contains contaminants that can harm your engine. Using a fresh 50/50 mixture of the correct coolant and distilled water is the best and most affordable insurance for your cooling system.
If you are performing a comprehensive system service, you might consider a full flush. You can learn more about the benefits in our guide on what a coolant flush does.
"Burping" Air From the System
With the funnel still in place and containing coolant, you are ready to "burp" the system to remove any remaining air pockets.
Start the vehicle's engine. Turn the cabin heater to its hottest setting and the fan speed to low. This is a critical step that opens the heater core, allowing coolant to circulate through the entire system.
Let the engine idle. As it warms up, you will see more bubbles rise through the funnel. The coolant level will drop when the new thermostat opens; be prepared to add more coolant to keep the funnel from emptying and introducing air. The process is complete when the bubbling stops and you hear the main engine cooling fans activate.
Final Leak Check and Test Drive
Once the temperature gauge stabilizes in the middle of its range, you are nearly finished. This is your final opportunity to identify any issues before driving.
With the engine still running, use a flashlight to perform a final inspection:
- Thermostat Housing: Look for any drips or moisture around the new gasket. Even a small amount of seepage indicates a leak.
- Hose Connections: Confirm that the radiator hose clamps are secure and that all connections are completely dry.
- Temperature Gauge: Monitor the gauge. The needle should remain steady in the normal operating range. If it begins to rise toward the red zone, shut off the engine immediately. This indicates that air is likely still trapped in the system.
After confirming there are no leaks and the temperature is stable, you can turn off the engine and allow it to cool down completely. Once it is cold, remove the funnel, top off the coolant reservoir to the "Full Cold" mark, and secure the cap tightly.
The job is now complete. You have successfully replaced a thermostat and verified your work with professional diligence.
When to Seek Professional Assistance for Your Car
Completing a DIY thermostat replacement is an excellent way to learn about your vehicle and reduce repair costs. However, unexpected complications can arise. Knowing when to stop and consult a professional is as important as knowing how to perform the repair.
This is not a sign of failure but a strategic decision to prevent a simple task from escalating into a major and costly problem.
Red Flags During the Repair Process
Sometimes, you may encounter an obstacle that requires specialized tools or expertise beyond a typical home garage setup. Forcing a solution can lead to significant damage.
Be cautious of a seized or broken bolt. Thermostat housing bolts are prone to corrosion and can become stuck. If a bolt resists reasonable force or snaps, it is best to stop. Attempting to drill out a broken bolt without the proper equipment can damage the engine block, resulting in a much more complex and expensive repair.
Another potential issue is a cracked thermostat housing. This damage may not be apparent until the part is removed. Even a hairline crack will cause a persistent coolant leak, regardless of how well the new gasket is installed.
Technicians often see cases where a DIY repair was attempted on a cracked housing with epoxy, only for it to fail under pressure and heat, leading to a sudden loss of coolant. A professional shop can source the correct replacement housing and ensure a durable, leak-free repair.
When the Problem Persists After the Repair
If you have followed all the steps correctly, but your vehicle continues to overheat, it is a clear indication that the thermostat was not the root cause. Diagnosing the true source of the problem now requires more advanced troubleshooting.
Several other conditions can cause an engine to overheat:
- A Clogged Radiator: Over time, sediment and corrosion can obstruct the radiator's internal passages, reducing its ability to dissipate heat.
- A Failing Water Pump: If the pump's impeller is damaged or corroded, it cannot circulate coolant effectively through the engine.
- A Malfunctioning Cooling Fan: A fan that fails to engage in stop-and-go traffic will cause the engine temperature to rise quickly.
- A Blown Head Gasket: This is the most serious possibility. A compromised head gasket can allow hot exhaust gases to enter the cooling system, causing rapid overheating and risking severe engine damage.
A professional technician has specialized tools, such as cooling system pressure testers and block testers, to accurately pinpoint the real issue, saving you the time and expense of replacing parts through trial and error.
Making an Informed Decision for Your Vehicle
Choosing to call a professional is not an admission of defeat; it is an informed decision. The average cost for a professional thermostat replacement is between $150 and $300, a price that often includes diagnostic verification that the thermostat is indeed the problem.
When you weigh this cost against the risk of breaking a bolt or misdiagnosing a more serious issue like a blown head gasket, having a professional handle the job is often the most prudent and cost-effective solution.
For drivers in Plano, TX, and the surrounding areas, professional help is readily available. If your DIY project encounters a problem, or if you prefer to have an expert handle it from the start, the ASE-certified technicians at Express Lube & Car Care are ready to assist. We can address your cooling system issues promptly, with no appointment necessary. Visit us and let our team get you back on the road safely. Learn more about our services and discounts on our website.