

You hear it on the way to work first. The car sounds deeper, rougher, almost like it got louder overnight. Then maybe the check engine light comes on, or you catch a faint exhaust smell at a stoplight and wonder if you’re imagining it.
You probably aren’t. Fixing an exhaust leak starts with treating those early clues seriously, because the problem usually doesn’t stay small for long. Some leaks are minor and can be patched long enough to get you by. Others are safety issues from the start, especially if the leak is near the engine or you smell fumes in the cabin.
From a technician’s point of view, the goal is simple. Find the exact leak, judge whether the metal around it is still sound, and choose the repair that matches the damage. That’s where most DIY advice falls short. It either tells you to slap on tape for everything or says to hand the car over immediately. Real life sits in the middle.
The Telltale Signs of an Exhaust Leak You Cannot Ignore
A lot of drivers notice the noise before anything else. On cold start, the engine suddenly has a puffing or ticking sound. Under acceleration, the car may rumble more than normal. If the leak is farther back, the sound can come across as a drone from under the floor. If it’s near the manifold, it often sounds sharper.
What drivers usually notice first
These are the signs that deserve attention:
- A louder exhaust note: The vehicle sounds rougher at idle or more aggressive when accelerating.
- A smell that doesn’t belong: Exhaust fumes or a gas-like smell around the car or inside the cabin are a warning sign.
- A check engine light: Some leaks affect sensor readings and trigger faults.
- A drop in drivability: The engine may feel less smooth, especially if the leak is near the front of the exhaust system.
A leak isn’t just a noise issue. Left alone, it can waste fuel, shorten oxygen sensor life, and damage the catalytic converter. That’s the expensive part. A $100 to $300 gasket replacement can turn into a $1,200 to $3,000+ catalytic converter replacement if the problem is neglected, according to this exhaust leak symptoms breakdown.
Why waiting gets expensive
Small leaks often start at a gasket, flange, flex pipe, or rusted seam. Drivers ignore them because the car still runs. But exhaust systems don’t repair themselves. Heat cycles, vibration, and corrosion keep opening the leak up.
Practical rule: If the sound changed suddenly, assume something changed physically. Don’t wait for the next inspection to find out what it was.
The best time to catch an exhaust leak is during routine maintenance. A lot of vehicle owners already track warning signs through apps and connected tools, and broader resources on understanding vehicle health can help you pay attention to patterns before they become bigger repair bills.
The main point is this. If the car got louder, smells different, or started showing a warning light, don’t write it off as age. Exhaust leaks tend to start as manageable repairs and end as much bigger ones when they’re ignored.
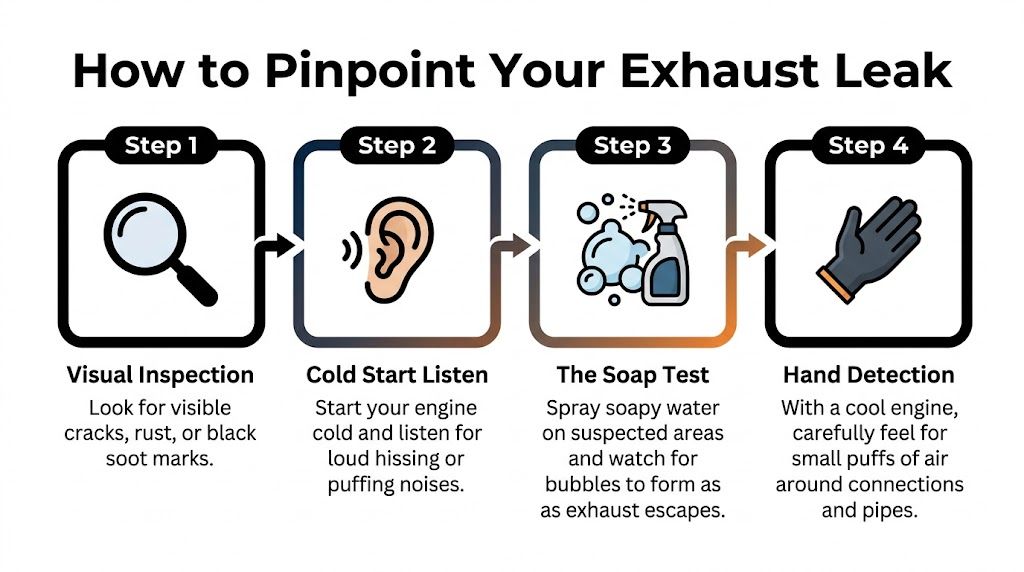
How to Pinpoint the Source of Your Exhaust Leak
Finding the leak matters more than guessing at the fix. Tape over the wrong spot, and you still have the same problem. Worse, some cars have more than one leak, especially when corrosion has started at multiple joints.
Start cold. That gives you a safer working surface and makes visual inspection easier.
Start with your eyes before your ears
Work from the engine toward the tailpipe. Look at the manifold area, gasket connections, flex pipe, resonator, muffler seams, clamps, and hangers.
You’re looking for a few specific clues:
- Black soot: This is one of the clearest signs that exhaust gas has been escaping.
- Visible cracks: Pay close attention to welds, flange edges, and bends in the pipe.
- Rust swelling or flaking metal: If the pipe is thinning, a patch usually won’t hold for long.
- Loose joints or crooked connections: Movement at a connection point often means a sealing problem.
Professionally, we pay very close attention to connection points because they fail often. In pressure-testing guidance used in the trade, manifold joints account for 60% of leaks and can reduce engine efficiency by 15% to 20% if they’re not addressed. The same guidance notes that shops use 4 to 5 psi pressure tests and treat less than 1 liter per minute of leak flow as acceptable. It also states that soapy water during that test can pinpoint leaks with 95% accuracy, which is much better than listening alone, as outlined in this pressure testing reference.
Listen on a cold start
Once you’ve looked things over, start the engine cold and listen. Cold starts often make a leak easier to hear before the metal expands.
A manifold leak may sound like a ticking or tapping near the engine. A pipe or flange leak under the car usually sounds more like hissing, puffing, or chuffing. Don’t rely on sound alone, but use it to narrow your search.
If your warning light is on while this is happening, it helps to understand how exhaust-related faults and sensor issues can connect to drivability problems. This guide on a check engine light gives useful context before you start chasing parts.
Use the soap test carefully
For a home diagnosis, the soap test is one of the better methods. Mix soapy water in a spray bottle. With the system safely pressurized or while the engine is running in a controlled, ventilated setting, spray suspected areas and watch for bubbling.
Check around:
- Flange connections
- Clamp joints
- Small rust holes
- Muffler seams
- Flex pipe braid areas
If bubbles form in one spot repeatedly, you’ve probably found the leak path.
Don’t spray randomly and assume the first bubble is the whole problem. Corroded systems often leak in more than one place.
Use your hand only with caution
With a cool engine and safe access, you can feel near suspected joints for faint puffs of air. Keep your hand offset from the pipe opening area rather than directly on hot or moving parts. Gloves help, but they don’t make a hot exhaust safe.
This method is helpful for confirming a leak you already suspect. It’s not the best primary test.
Why shop diagnosis is more precise
At the shop level, the difference is control. A lift gives better access. Pressure or smoke testing isolates tiny leaks that get lost under normal engine noise. That matters on leaks hidden above shields, behind crossmembers, or around manifold gaskets.
A good diagnosis doesn’t just answer where it’s leaking. It answers whether the metal is repairable, whether the flange is warped, and whether the sensor readings suggest other damage already happened.
Essential Safety Precautions Before You Start Any Repair
Most DIY exhaust advice gives safety one short paragraph and moves on. That’s backwards. Safety is the first decision in fixing an exhaust leak, because this is one of those repairs where a bad setup can hurt you fast.

The basics that aren’t optional
Before you touch the exhaust system:
- Let the vehicle cool fully: Exhaust pipes, converters, and manifolds stay hot long after shutdown.
- Park on level ground: Uneven surfaces make lifting the car riskier.
- Use jack stands, not just a jack: A hydraulic jack lifts. It does not safely support you while you work underneath.
- Chock the wheels: Keep the vehicle from rolling, especially if one end is raised.
- Wear eye protection and gloves: Rust flakes, scale, and road debris fall directly into your workspace.
If the pipe is badly corroded, expect it to crumble when touched. That’s not a sign to keep pushing harder. It’s a sign the repair may already be beyond a home patch.
Carbon monoxide is the real danger
The biggest safety issue isn’t the sharp edge on a rusty clamp. It’s carbon monoxide.
DIY exhaust repairs carry a serious CO poisoning risk. The CDC attributes 10% to 15% of the roughly 400 annual CO poisoning deaths in the U.S. to vehicles, and an exhaust leak before the catalytic converter can allow 50 to 100 ppm into the cabin without any smell. A 5 to 10 minute idling test in a garage can expose a person to 200 to 500 ppm, according to this DIY exhaust leak warning.
That means a “quick test” in the garage isn’t harmless. It can be dangerous even if the garage door is open.
If you smell exhaust in the cabin, stop treating the problem like a noise complaint. Treat it like an air-quality problem.
When to stop before you start
There are situations where the safe move is not to continue:
- You need to run the engine indoors to confirm the leak
- The leak appears to be near the manifold or front pipe
- The pipe is too rusted to support a clamp or patch
- You can’t raise the vehicle securely
- You feel lightheaded, irritated eyes, or a headache while testing
Those symptoms don’t mean “finish fast.” They mean shut the car off, get into fresh air, and stop.
A safe exhaust repair starts with ventilation, stable vehicle support, and enough access to inspect the whole affected area. Without that, you’re not repairing the car. You’re gambling around a hot, heavy machine that routes toxic gas under your floor.
Choosing Your Repair Method Temporary Fixes vs Permanent Solutions
Not every leak needs the same answer. A tiny pinhole in otherwise solid pipe is different from a split seam on a rusted muffler. Fixing an exhaust leak correctly means matching the repair method to the size of the leak, the location, and the condition of the surrounding metal.
When a temporary fix makes sense
Temporary repairs have one job. Buy time.
If you’ve got a small leak in a non-structural section of pipe and the metal around it is still solid, a short-term patch can help you get by until proper repair is scheduled. Common options are high-temperature exhaust tape, epoxy putty, or a metal patch with clamps.
The key detail is prep. Most patch failures happen before the product even cures.
According to this temporary versus permanent repair guide, tape or putty is 65% to 80% effective for less than one month, but success drops to 10% by six months. The same guide notes that 75% of patch failures come from improper surface prep, while professional welded repairs hold at 95%+ beyond two years. It also puts a typical DIY temporary fix at around $40.
How to get the best result from a patch
If you’re going to patch it, do the prep like it matters, because it does.
- Cool the exhaust completely: Don’t try to apply tape or epoxy to hot metal.
- Clean aggressively: Use a wire brush or sandpaper to remove rust, scale, and loose debris.
- Degrease and dry the area: If the surface is dirty or damp, the bond suffers.
- Follow the product instructions exactly: Tape needs overlap. Putty needs full contact and cure time. Clamp-on patches need even pressure.
- Retest after curing: Don’t assume silence means success. Recheck for escaping gas.
A temporary repair is most reasonable on a small pinhole, a minor seam issue, or a joint that can accept a patch and clamp cleanly. It is not a good idea on manifolds, converter-adjacent damage, or metal that’s rusted thin around a wide area.
A patch works best when the leak is small and the surrounding pipe is still worth saving. If the metal is already failing, the patch is only sticking to a problem.
What permanent repair looks like
Permanent repair usually means one of three things:
- Welding a crack in otherwise healthy metal.
- Replacing a section of pipe that has rust holes or a split.
- Replacing a component such as a gasket, flex pipe, muffler, or catalytic converter.
This is the point where material condition matters more than leak size. A tiny crack on good pipe can be welded. A small hole in paper-thin rusted metal usually needs replacement, because welding weak metal often burns it back farther.
Shops also handle the parts DIY repairs miss. Flange faces may need cleaning. Rusted fasteners may snap. Heat shields may hide the actual failure. Sensor issues can overlap with exhaust leaks and confuse the diagnosis.
Exhaust Leak Repair Options Compared
| Repair Method | Typical Lifespan | Best For | Estimated Cost |
|---|---|---|---|
| Exhaust tape or putty | Less than one month in many cases, with success dropping sharply by six months | Small pinholes or very minor cracks in otherwise solid pipe | Around $40 |
| Patch with clamps | Temporary use only | Small holes at accessible straight sections or joints | Around $40, depending on materials |
| Welded repair | Long-term, with 95%+ success beyond two years | Localized cracks or leaks in solid metal | Professional minor repair pricing varies within typical shop ranges |
| Section replacement | Long-term | Rusted or split pipe sections, failed flex pipe areas, damaged joints | Usually falls within professional repair ranges depending on severity |
| Component replacement | Long-term | Failed gasket, muffler, oxygen sensor issue, or catalytic converter damage | Varies widely by component |
The simple decision rule
Use a temporary fix only if all three are true:
- The leak is small
- The surrounding metal is solid
- You’re treating it as a short bridge to proper repair
Choose permanent repair when any of these are true:
- The leak is near the engine
- The metal is heavily rusted
- The crack is larger than a small pinhole
- A previous patch already failed
- The vehicle has warning lights or exhaust smell inside
That’s the core trade-off. Temporary repairs are about convenience. Permanent repairs are about reliability and safety.
Understanding the Costs of Fixing an Exhaust Leak
Most drivers ask the cost question right after they confirm the leak. That makes sense, but the honest answer depends on what failed, how far the damage spread, and whether the repair is a patch, a weld, or a replacement.
What the price ranges usually look like
DIY patch kits typically cost $30 to $50, and they’re mainly for short-term use. Professional repairs for minor leaks commonly range from $100 to $400, while major replacements such as a muffler or catalytic converter can run $500 to $1,500 or more, according to this exhaust leak cost guide.
Some component-specific repairs swing harder:
- Exhaust gasket replacement: $100 to $300
- Oxygen sensor replacement: $200 to $500
- Catalytic converter replacement: $1,200 to $3,000 or more
Repair time rises with complexity too. Small leaks may take 30 minutes to 1 hour, moderate repairs often take 1 to 3 hours, and major replacement work can take 3+ hours or a full day, based on the same Fleetio reference.
Why the estimate can change after inspection
Two cars can have what sounds like the same leak and end up with different estimates.
One may need a simple clamp-area repair. Another may have rust that spread farther than expected once the car is on a lift. That’s common with muffler seams, flex pipes, and flange connections. You don’t always see the full problem from the driveway.
This is also where emissions concerns matter. If you’re dealing with a warning light or inspection trouble, it helps to understand how exhaust system condition ties into testing. This guide on passing emissions gives useful background before you decide how long to wait.
The cheapest repair is often the early one
The most economical exhaust repair is usually the first one. A small leak caught early may stay in the lower repair range. Leave it alone, and it can affect sensors, overwork other parts of the system, and push the job into replacement territory.
The invoice usually gets bigger when the leak keeps driving, not when the shop starts inspecting.
If you’re budgeting, think in layers. First is diagnosis. Second is whether the metal is repairable. Third is whether nearby parts have already been affected. That’s why getting the leak identified early saves money more reliably than trying to stretch every noise for another month.
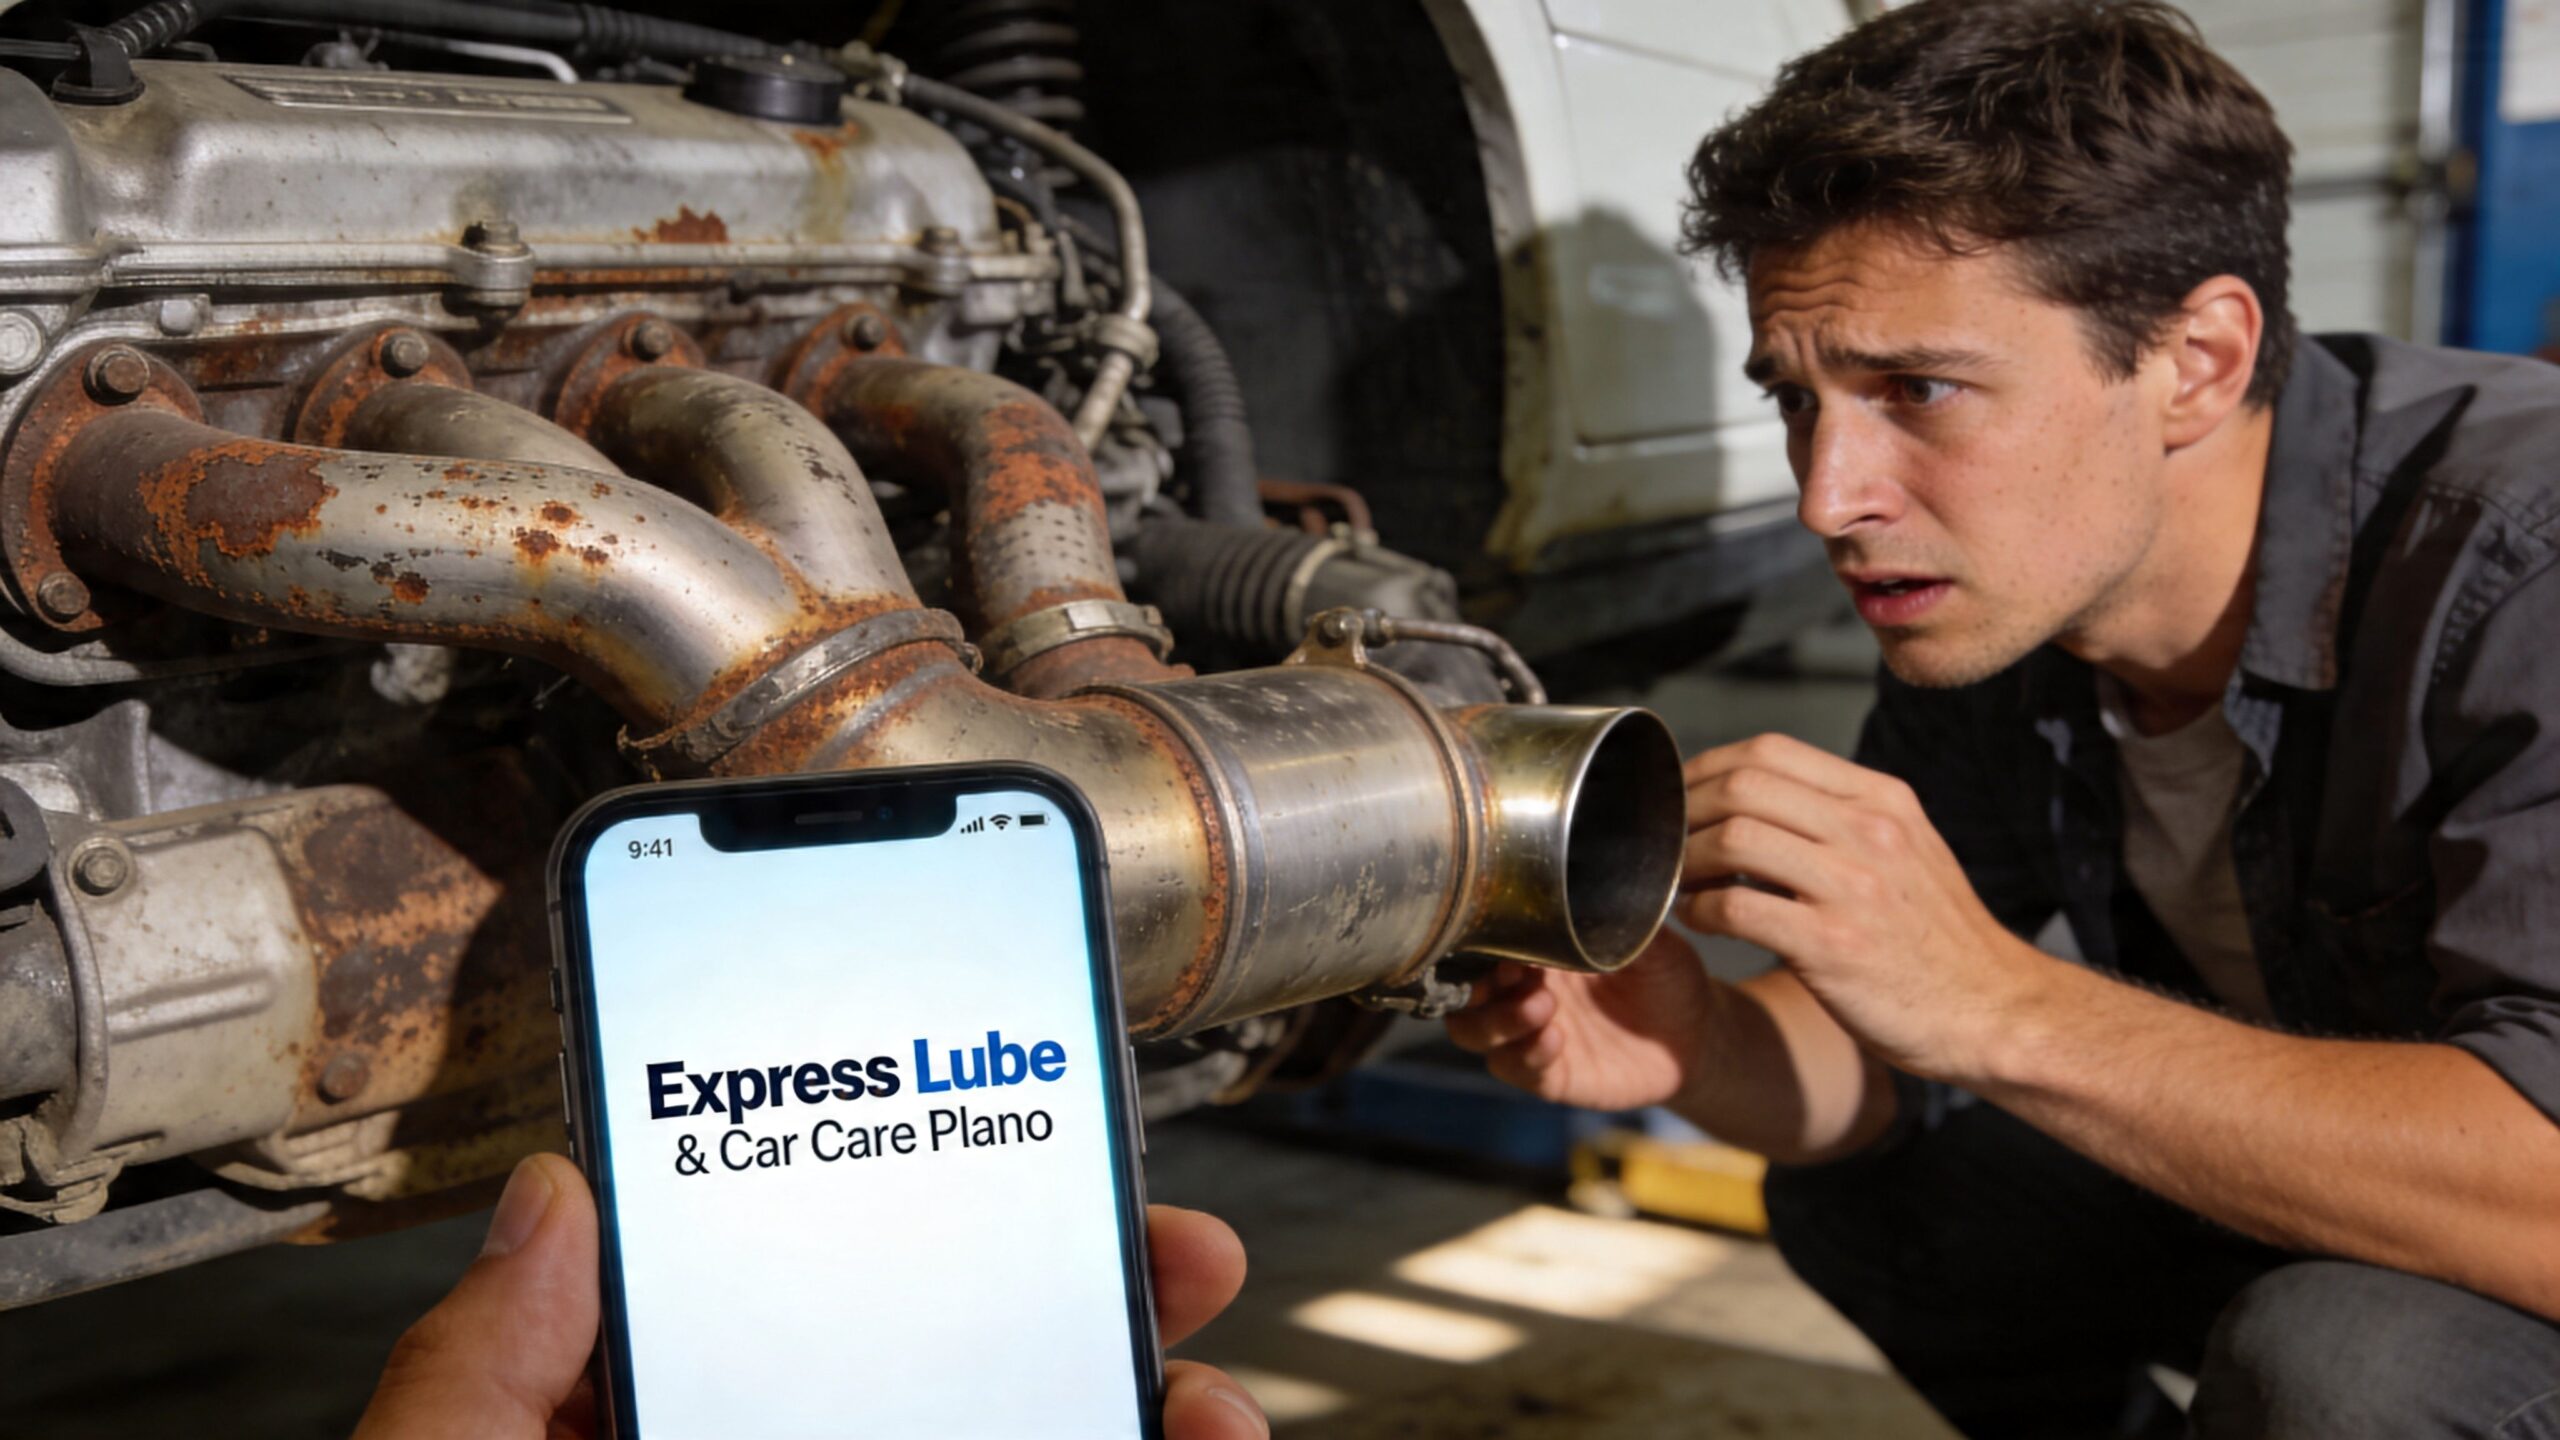
When to Skip the DIY and Visit Express Lube & Car Care in Plano
Some exhaust leaks are fair DIY projects. Others are the kind of repair that tells you, quickly, to stop crawling around on the driveway and put the car in a bay.
The red flags that change the decision
Skip the home fix if any of these are true:
- The leak is at the manifold or very close to the engine
- You smell exhaust inside the cabin
- The pipe is badly rusted or crushes easily
- The crack is larger than a small localized hole
- A previous tape or putty repair already failed
- The fasteners are heavily corroded and likely to seize or break
- You don’t have safe lifting equipment and enough workspace
These situations tend to need more than a surface repair. They need full access, proper testing, and often replacement parts rather than patch material.
What a shop handles better
A shop can put the vehicle on a lift, inspect the entire exhaust path, and determine whether you’re dealing with a single leak or multiple weak points. That matters because a patch on the obvious hole doesn’t solve the next rust split a few inches away.
Professional diagnosis also helps when the symptom isn’t just noise. If the leak has affected sensor readings or emissions behavior, the repair may involve more than the pipe itself. That’s where full muffler and exhaust service becomes the practical next step, especially if you need inspection-ready repairs. For that kind of work, this muffler service page is the relevant place to start.
Why this is the smart call, not giving up
A lot of drivers think taking an exhaust problem to a shop means they failed the DIY test. It doesn’t. It means they recognized the point where safety, time, and repair quality matter more than squeezing one more patch out of a rusty pipe.
That’s similar to how people handle appearance versus mechanical work. Washing and upkeep are easy to outsource when time is short, and services like mobile detailing services make sense for convenience. Exhaust work is even more clear-cut when the repair involves toxic gas, heat, seized hardware, and undercar access.
A good repair decision is about limits. If the leak is minor and accessible, a short-term patch may be reasonable. If the leak is structural, forward in the system, or tied to fumes and warning lights, the smart move is professional repair.
Frequently Asked Questions About Exhaust Leaks
Can I keep driving with an exhaust leak
Maybe, but that doesn’t mean you should. The answer depends on the location and severity of the leak.
If the leak is small and near the rear of the vehicle, the car may still be drivable for a short period. If the leak is near the manifold or you smell exhaust inside the cabin, treat it as a safety issue and stop delaying the repair.
Can an exhaust leak cause a check engine light
Yes. Exhaust leaks can affect sensor readings, especially when they happen upstream in the system.
That can confuse the engine computer and trigger warning lights or drivability complaints. If the light appeared at the same time the sound changed, don’t assume the sensor itself is the root problem.
Is exhaust tape a real fix
It’s a real temporary fix. It is not a dependable permanent fix.
Tape or putty can buy you a little time on a small leak if the surrounding metal is still solid and the surface was cleaned properly. It’s a stop-gap, not a long-term repair plan.
How do I know if it’s a leak or just a louder aftermarket exhaust
A modified exhaust is usually consistently louder by design. A leak usually changes the sound suddenly and often adds other signs, like ticking, hissing, soot marks, fumes, or a warning light.
If the vehicle wasn’t loud before and now it is, inspect it.
Where do exhaust leaks happen most often
Common spots include manifold gaskets, flange joints, flex pipes, muffler seams, and rusted sections of pipe. Connection points deserve special attention because they’re frequent failure areas.
Leaks also show up where water and road debris sit, especially in low sections of the exhaust.
Does a patch work on a rusted muffler
Usually not for long. If the metal around the leak is thin, flaky, or soft, the patch doesn’t have much sound material to grip.
In that case, replacement is usually the better answer.
What should I do first if I suspect a leak today
Start with a cold visual inspection. Look for soot, cracks, rust, and loose joints.
If you smell fumes in the cabin, hear a sharp leak near the engine, or can’t inspect the car safely, skip the driveway diagnosis and have it checked professionally.
If your car suddenly sounds louder, smells like exhaust, or shows a warning light, don’t let a small leak turn into a bigger repair. The ASE-certified team at Express Lube & Car Care can inspect the system, pinpoint the source, and recommend the right fix, whether that’s a simple repair or a full exhaust service.