

You're probably reading this because your brake pedal doesn't feel quite right, or you've noticed brake fluid service on a maintenance list and aren't sure whether it matters. Around Plano, that question comes up a lot. People stay on top of pads and rotors, but fluid gets ignored because you can't see it working.
That's a mistake. Brake fluid is one of the few maintenance items that directly affects how your vehicle responds when you need to stop now, not later. If you want to flush brake fluid yourself, you need the right process and the right fluid. If you'd rather hand it off, it helps to know what a proper service looks like so you can make a smart call.
Why Clean Brake Fluid is Your Most Important Safety Check
A soft pedal in stop-and-go traffic isn't just annoying. It can be the first sign that the hydraulic side of your brake system isn't doing its job the way it should.
Brake fluid transfers the force from your foot at the pedal to the brakes at each wheel. That fluid needs to stay stable under heat and pressure. When it's in good shape, it does that in the background. When it's contaminated, the whole system starts feeling less predictable.
Why brake fluid doesn't last forever
The key word is hygroscopic. Brake fluid absorbs moisture over time. That happens slowly, but it happens even in normal use, and heat makes the problem harder to ignore.
For Plano drivers, that matters because daily commuting often means repeated braking, hot pavement, and long stretches of slow traffic. Moisture in the fluid lowers its boiling point, and once the fluid gets stressed by heat, pedal feel and braking consistency can suffer.
Clean brake fluid isn't a cosmetic service. It protects the hydraulic part of the braking system when temperature and pressure are highest.
One verified brake-fluid benchmark shows that fluid in good condition has a boiling point around 400°F (204°C), while water boils at 212°F (100°C). That same guidance notes that even 3% moisture contamination can dramatically lower the fluid's boiling point and increase the risk of brake fade and vapor lock under hard braking, as shown in this brake fluid moisture demonstration.
What that means in real driving
If the pedal feels spongy, or the car takes more effort to stop smoothly, don't treat that as normal aging. Brake fluid condition can be part of the problem, especially if the fluid hasn't been serviced in a while.
If you want a deeper look at whether this service is worth doing, this guide on whether a brake flush is necessary is a useful next read. The short version is simple. If the fluid is old, moisture-contaminated, or causing symptoms, a flush is a safety service, not an upsell.
Telltale Signs Your Brake Fluid Needs Changing
Some drivers wait for a mileage reminder. Others wait until the brakes feel wrong. The smarter move is to watch for both service timing and real-world symptoms.
What to look for in the driveway
Start with the master cylinder reservoir. In many vehicles, you can see the fluid through the reservoir body or by carefully checking under the cap area. Fresh brake fluid is typically much cleaner-looking than old fluid.
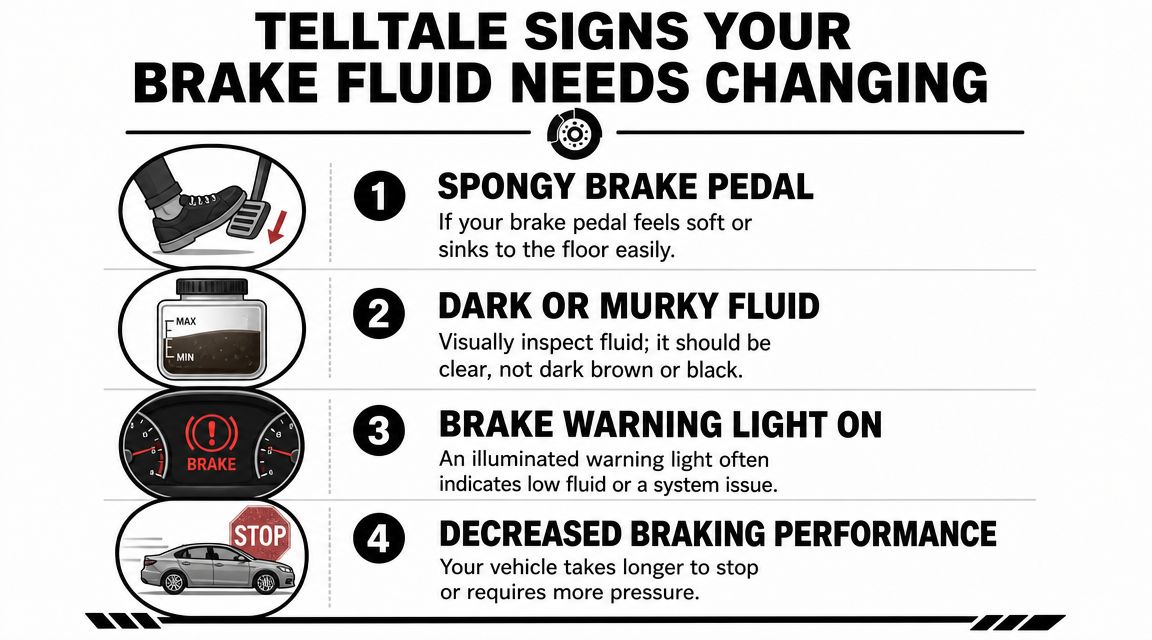
Watch for these signs:
- Spongy pedal feel. If the pedal feels soft or sinks more than it used to, the system may have air, moisture-contaminated fluid, or another hydraulic issue.
- Dark or murky fluid. Fluid that looks dirty instead of clean is a warning that contamination has built up.
- Reduced braking response. If it takes more pedal pressure to get the same stopping result, something needs inspection.
- Brake or ABS warning light. Warning lights don't always mean fluid condition alone, but they should never be ignored.
For a quick refresher on what normal fluid should look like and where to check it, this article on how to check brake fluid is a practical reference.
When timing matters more than mileage
A lot of owners don't drive enough miles to think about brake fluid. That's where people get caught. Fluid ages with time, not just distance.
Practical rule: Most auto manufacturers recommend a brake fluid flush every 2 to 3 years, or around 40,000 to 45,000 miles, and because the fluid is hygroscopic, age is often more important than mileage, according to Jiffy Lube's brake fluid service guidance.
That's why a lightly driven car can still need service.
A simple checklist
| Sign | What it suggests |
|---|---|
| Soft or spongy pedal | Fluid condition or air in the hydraulic system |
| Dark reservoir fluid | Contamination and aging |
| Longer stopping feel | Reduced braking performance |
| Warning light | A brake system issue that needs diagnosis |
Ignore these signs and you're gambling with the part of the vehicle that has the least room for error.
Your Step-by-Step Guide to a DIY Brake Fluid Flush
A brake fluid flush is doable at home if you work carefully, use the correct fluid, and don't rush. This job punishes shortcuts. If you want to flush brake fluid yourself, treat it like brake work, not like a casual fluid top-off.
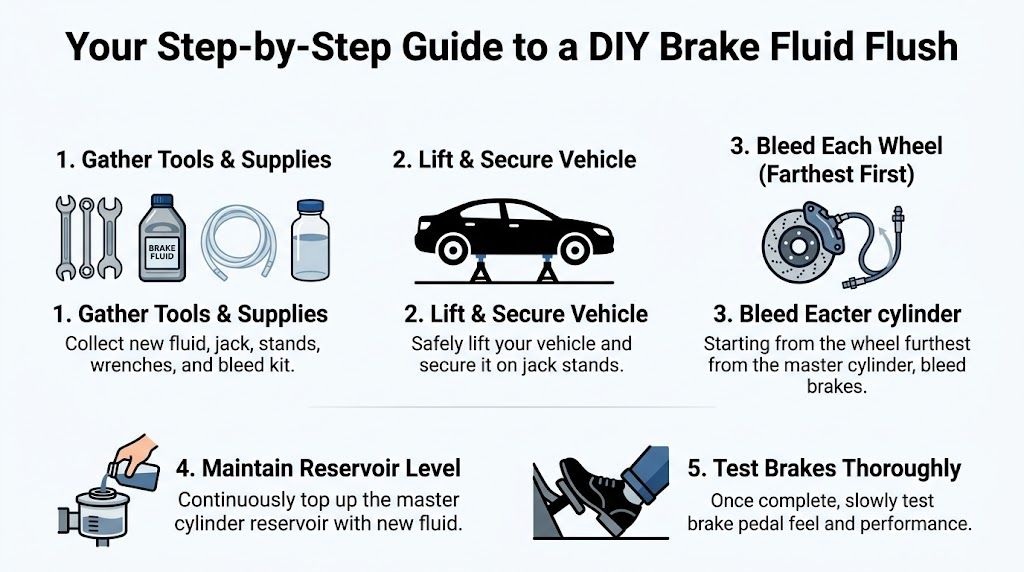
Gather the right tools first
Before the car leaves the ground, have everything laid out.
You'll want:
- Correct brake fluid. Check the cap on the reservoir or your owner's manual for the proper DOT specification, commonly DOT 3, DOT 4, or DOT 5.1.
- Box-end wrench sized for the bleeder screws.
- Clear vinyl tubing that fits snugly over the bleeder nipple.
- Catch bottle for used fluid.
- Turkey baster or suction tool for removing old fluid from the reservoir.
- Jack and jack stands or a lift.
- Gloves and eye protection because brake fluid is hard on paint and skin.
Never guess on fluid type. If the system is designed for one fluid family, mixing the wrong product can create expensive problems fast.
Start at the reservoir
The basic process begins at the master cylinder. Remove as much old fluid as you can from the reservoir without exposing internal components to dirt. Refill with fresh brake fluid of the correct type.
Keep the cap area clean. Dirt introduced here can move through the whole hydraulic system.
Here's a visual walkthrough before you begin the hands-on work:
Use the correct bleeding order
The standard method is to bleed from the wheel farthest from the master cylinder and move inward. For most left-hand-drive vehicles in the U.S., the sequence is right-rear, left-rear, right-front, then left-front, as outlined in AutoZone's brake fluid flush procedure.
A typical two-person pump-and-hold process looks like this:
- Attach the hose to the bleeder screw and place the other end into the catch bottle.
- Have a helper press the brake pedal and hold it down.
- Open the bleeder screw briefly so old fluid and air can exit.
- Close the bleeder screw before your helper releases the pedal.
- Repeat until the discharged fluid runs clear and bubble-free.
- Check the reservoir constantly and refill as needed before it drops too low.
- Move to the next wheel in the correct sequence.
If the master cylinder reservoir runs dry, air can enter the system. Then you're no longer finishing a flush. You're correcting a bleeding problem you created.
Final checks matter
Once all four corners are done, top off the reservoir to the proper level and secure the cap. Then reinstall wheels if removed, lower the vehicle, and press the brake pedal several times before moving the car.
The pedal should feel firm and consistent. Test the brakes slowly in a safe area before you head into traffic.
If the pedal still feels soft, don't assume it'll work itself out. It won't. That means there's still air in the system, the sequence was interrupted, or another brake problem needs attention.
Common Mistakes That Can Compromise Your Brakes
Most DIY brake fluid jobs go wrong in a few predictable ways. The dangerous part is that the mistake often shows up only after the car is back on the road.
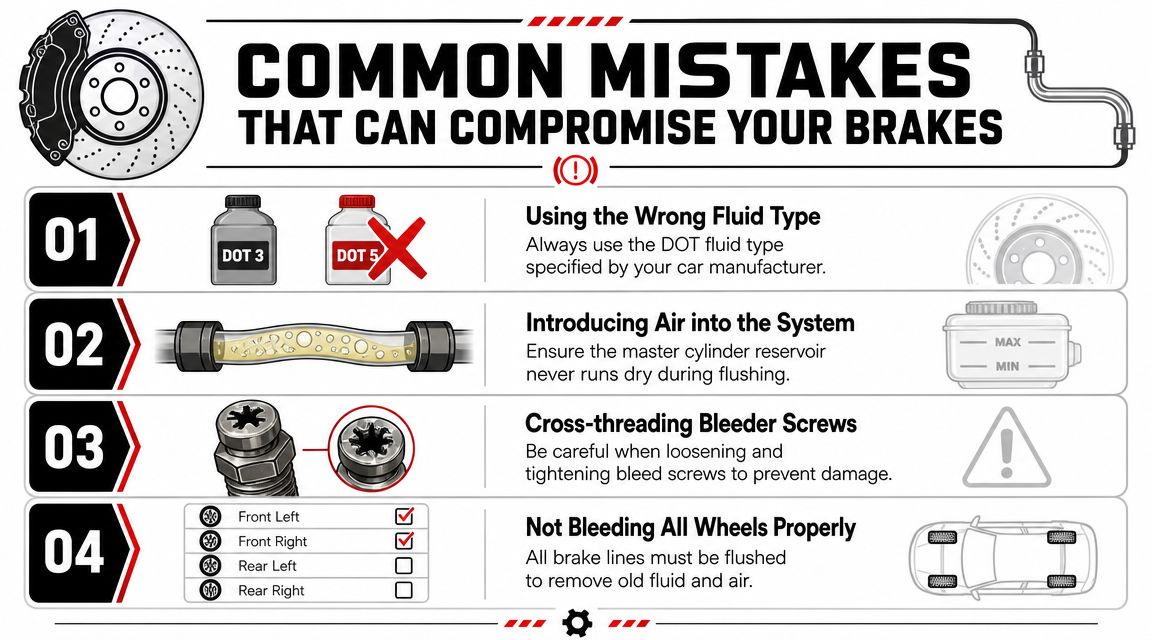
The mistakes that cause the most trouble
- Letting the reservoir run low. This is the classic error. Once air gets into the hydraulic system, pedal feel goes bad and the job gets bigger immediately.
- Using the wrong brake fluid. DOT specifications matter. Don't substitute based on what's sitting on the shelf in the garage.
- Damaging bleeder screws. These screws can seize, round off, or strip if you use the wrong wrench or force them carelessly.
- Stopping before all old fluid is cleared. A partial bleed can leave contaminated fluid in the system and produce uneven results.
What works and what doesn't
What works is patience, clean tools, and checking each step twice.
What doesn't work is winging it, mixing old bottles of unknown fluid, or assuming a softer pedal after the job is “close enough.” Brake hydraulics are not forgiving.
A brake pedal that feels worse after service is a warning, not a break-in period.
One small side note from the shop side of things. If you're already working around wheels and brakes, it's also a good time to clean accumulated grime. This guide on dissolving baked-on brake dust is useful if your wheels have heavy dust buildup and you want to clean them without making the mess worse.
When to Trust a Professional for Your Brake Fluid Flush
Some jobs are worth doing yourself. Some are worth handing over because the cost of getting them wrong is too high. Brake fluid service can fall into either category, depending on your tools, experience, and the condition of the vehicle.
When DIY stops making sense
Professional service is the smarter call if:
- You don't know the service history and aren't sure what fluid is in the system.
- The bleeder screws look rusty or seized.
- The pedal already feels unsafe, not just slightly different.
- Your vehicle may need a broader brake inspection, not just fluid exchange.
- You want the fluid tested and the system checked in one visit.
In a shop, technicians can use pressure or vacuum bleeding equipment that exchanges fluid more consistently than the average driveway setup. That also reduces the chance of introducing air during the process.
The cost trade-off
There's a practical money side to this. According to Kelley Blue Book's brake fluid flush cost guide, a professional brake fluid flush averages $173 to $205. That same guidance notes that this preventive service helps avoid internal corrosion that can damage brake lines and calipers, which can cost several hundred dollars to replace.
That's the key decision. Spend a controlled amount on maintenance, or risk much larger repair bills after contaminated fluid starts attacking hydraulic components.
What a shop should do besides swapping fluid
A proper service shouldn't stop at pumping out old fluid. A technician should also look at brake condition more broadly, especially if the customer reports soft pedal feel or reduced braking confidence.
If you want to know what a complete inspection can include, this overview of what brake service includes lays out the bigger picture. In Plano, a shop such as Express Lube & Car Care can handle the fluid exchange and inspect related brake components during the same visit, which is often the safest option when symptoms are already present.
Drive with Confidence with Express Lube Plano
Brake fluid doesn't get much attention until the pedal feels wrong. By then, you've already waited too long. Whether you choose to flush brake fluid at home or have a technician handle it, the point is the same. Keep the hydraulic system clean, dry, and working the way it should.
For drivers around Plano, timing shouldn't rely on a generic rule alone. In humid markets like Texas, shops often recommend brake fluid service based on moisture testing and symptoms, not just a universal calendar schedule, as explained in this Texas-focused brake fluid service discussion.
If your brake pedal feels soft, your fluid looks dark, or you don't know when it was last changed, get it checked before that uncertainty turns into a safety problem. A quick inspection now is a lot easier than dealing with a brake system repair later.
If you want a brake fluid inspection or service from ASE-certified technicians, stop by Express Lube & Car Care. You don't need an appointment, and the team can check fluid condition, look for brake system issues, and help you decide whether a flush makes sense for how and where you drive.