

When the check engine light illuminates on your dashboard, it's a notification from your vehicle's diagnostic system that a potential issue has been detected. To understand the cause, you need an On-Board Diagnostics (OBD-II) scanner. This is a diagnostic tool that plugs into a standardized port in your vehicle, typically located under the dashboard.
The scanner communicates with your car's computer to retrieve the specific Diagnostic Trouble Code (DTC) it has stored. This code serves as the starting point for diagnosing the problem. Understanding what the code means empowers you to address minor issues before they escalate into more significant and costly repairs.
The Function of the Check Engine Light
The check engine light is your vehicle's primary method for communicating a potential malfunction. The signal originates from the On-Board Diagnostics (OBD-II) system, which is the vehicle's integrated computer responsible for continuously monitoring engine performance, emissions, and other critical systems.
Prior to 1996, diagnosing engine problems was a complex process. Each automobile manufacturer used proprietary diagnostic systems, which made repairs inconsistent and challenging for mechanics. A federal mandate standardized these systems, requiring all new vehicles to implement the OBD-II protocol. This was a transformative development, ensuring any technician could use standardized tools to read codes from any vehicle.
This intelligent system is designed to identify a problem as soon as it occurs, logging a specific Diagnostic Trouble Code (DTC) that points directly to the source of the issue.
Interpreting the Light's Behavior
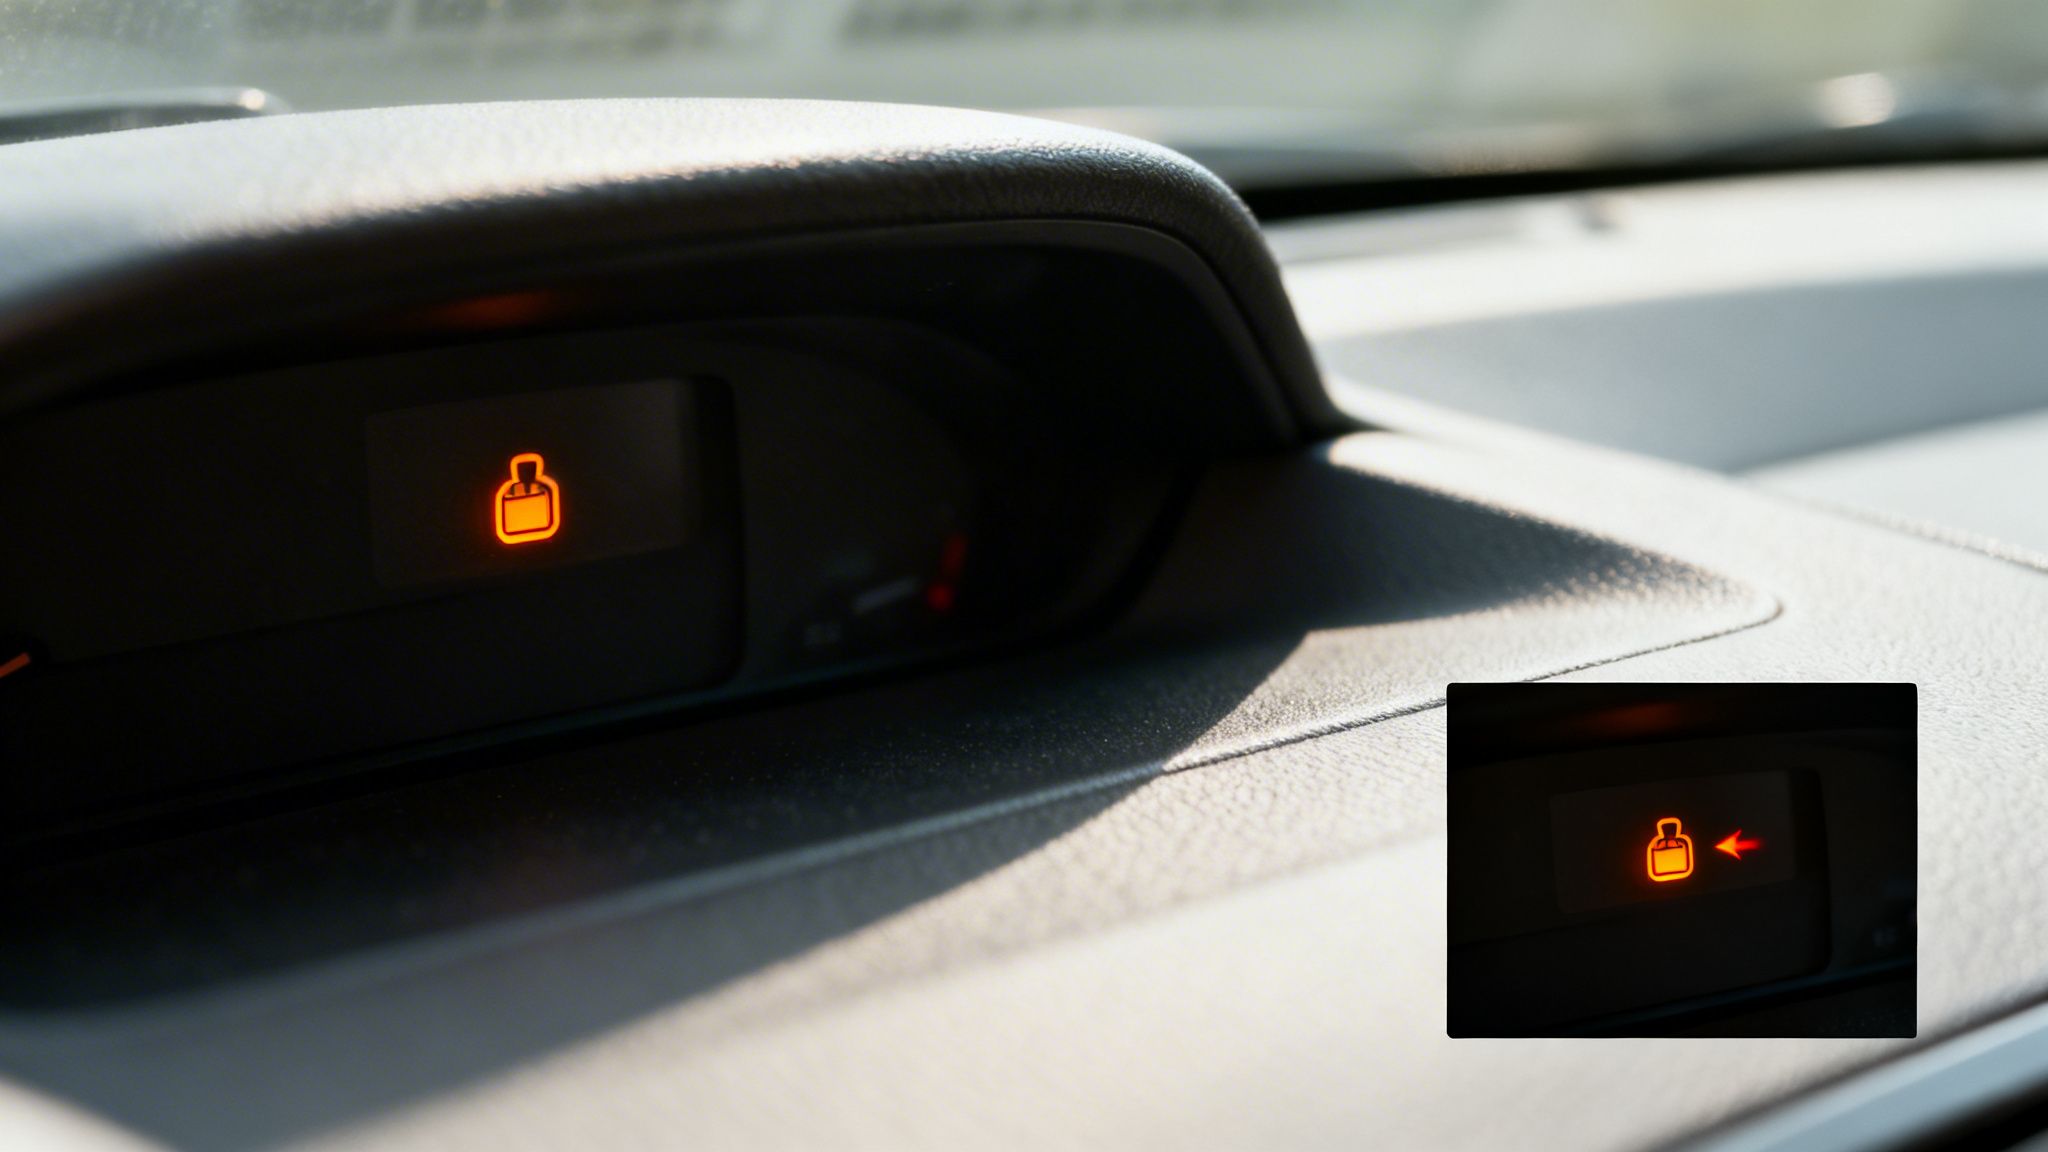
Not all check engine light illuminations carry the same level of urgency. Your vehicle uses two primary signals to indicate the severity of the problem, and every driver should be able to distinguish between them.
A steady, solid check engine light typically indicates a non-emergency issue. This could be caused by something as minor as a loose fuel cap or a sensor that is beginning to fail. While immediate action is not required, the vehicle should be inspected soon to prevent the issue from worsening.
A flashing check engine light signifies a critical engine malfunction that requires immediate attention. This is a serious alert. It almost always indicates a severe engine misfire, which can cause unburned fuel to enter the exhaust system. Continuing to drive under these conditions can rapidly destroy the catalytic converter—a repair that can cost thousands of dollars.
If the check engine light is flashing, find a safe location to pull over and shut off the engine as soon as possible. This is the most effective way to prevent catastrophic and expensive damage. You can explore what causes the check engine light to illuminate in our detailed article.
Understanding these signals is the first step toward managing your vehicle's health. It allows you to make an informed decision—whether it’s a simple repair you can perform yourself or a signal that it's time for professional diagnostics.
Selecting the Appropriate OBD-II Code Reader
To interpret the message from your check engine light, you need a tool capable of translating your vehicle's diagnostic language. That tool is an OBD-II scanner, also known as a code reader.
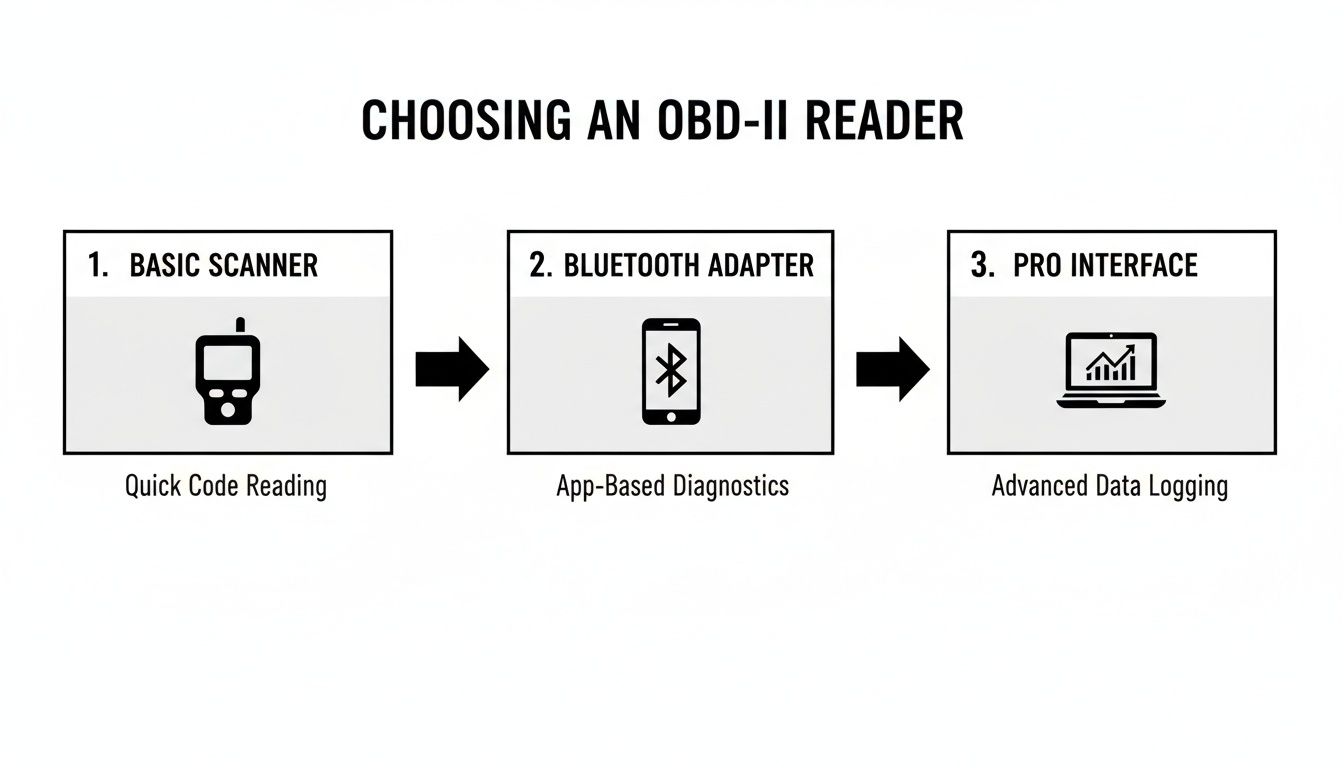
The market offers a wide range of options, from basic handheld devices to sophisticated diagnostic interfaces. The ideal tool for you will depend on your budget, technical skill level, and how in-depth you wish to go with your vehicle's diagnostics.
Basic Handheld Code Readers
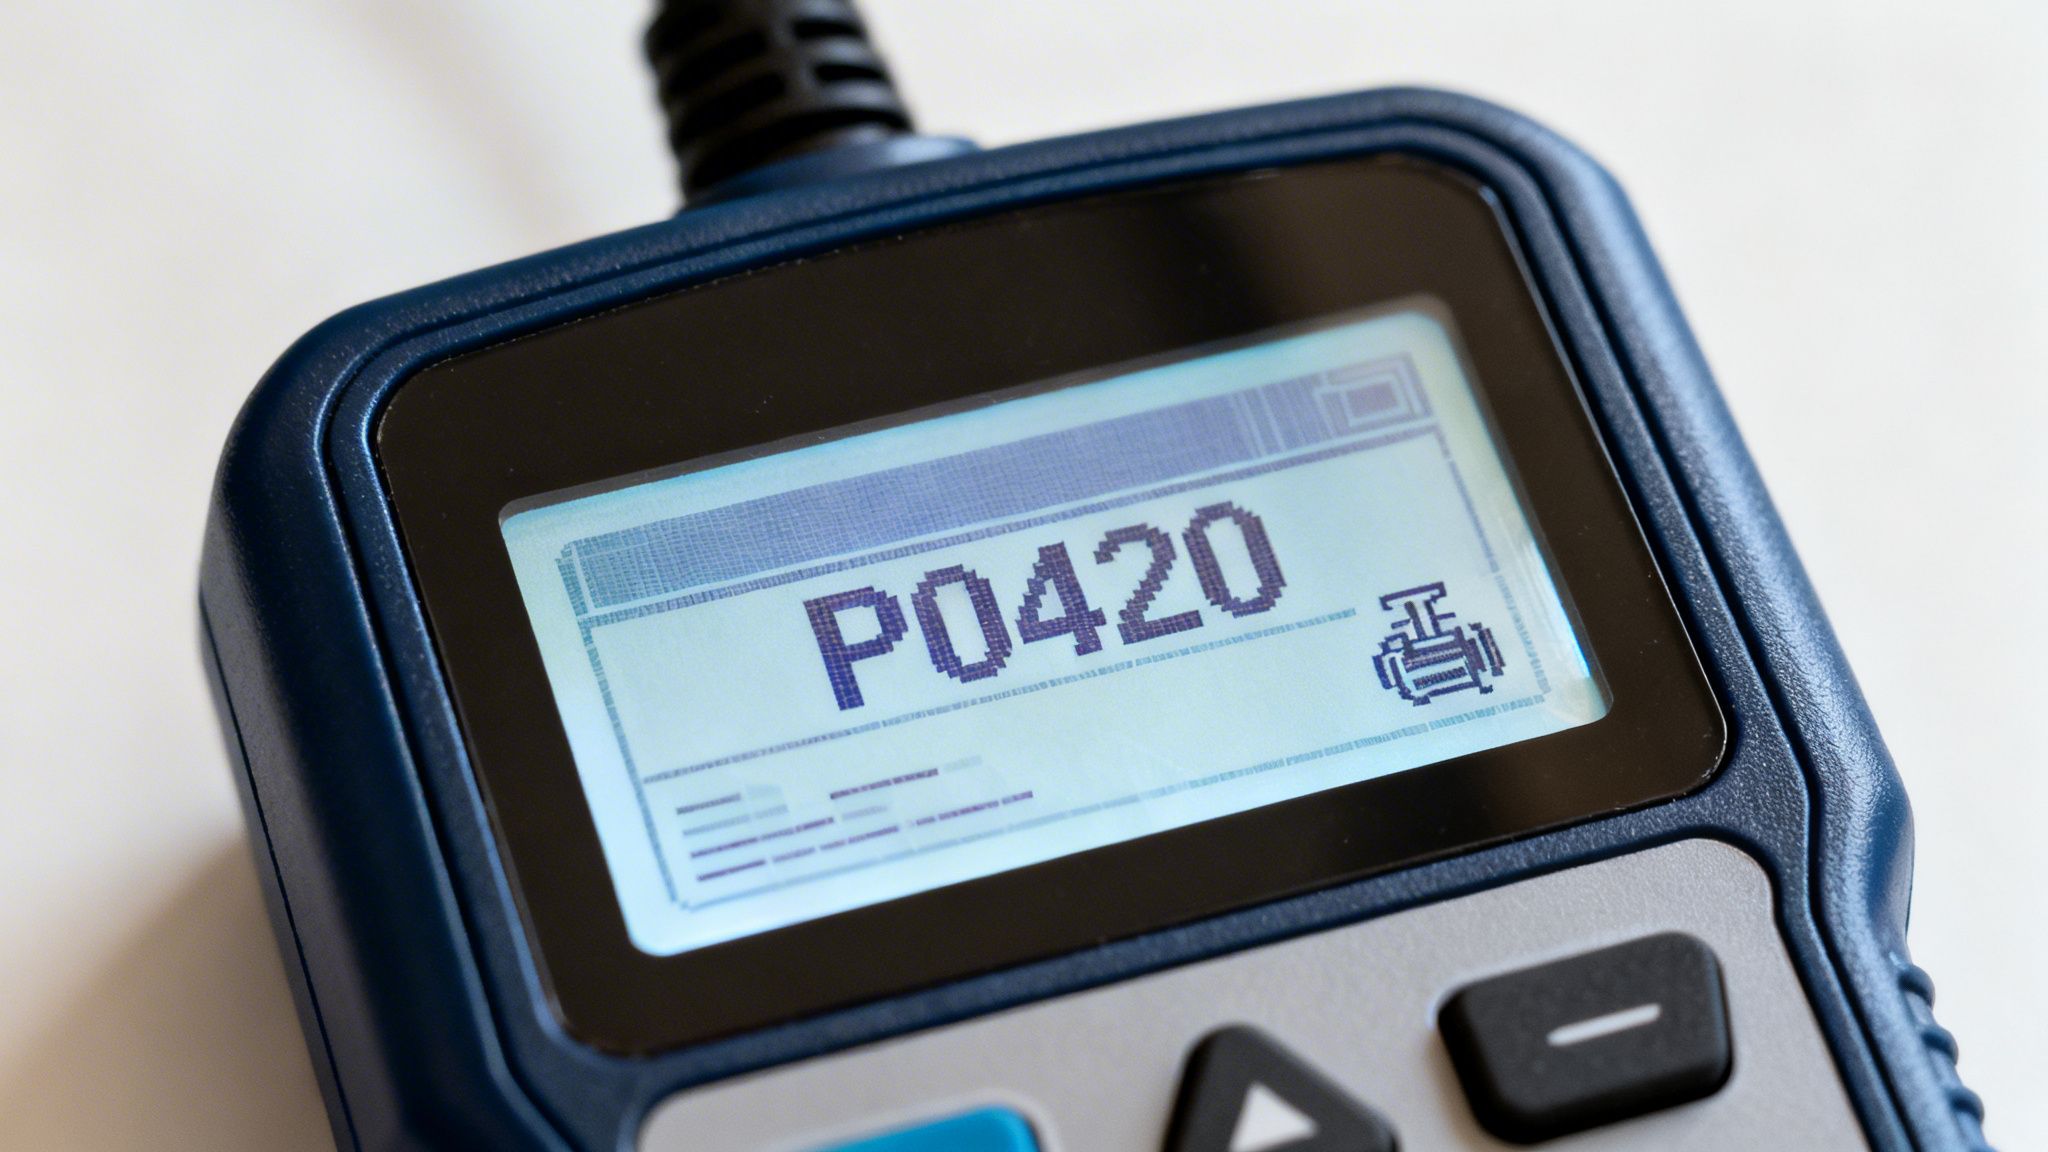
A basic handheld code reader can be considered the simplest form of diagnostic tool. It is a self-contained device with a small screen and an integrated cable that connects directly to your car's OBD-II port. Its primary function is to read the trouble code (e.g., P0420) and provide a brief, one-line definition of its meaning.
These devices are ideal for beginners. They do not require a smartphone, external batteries, or a complex setup process. You simply plug it in, turn your car's ignition key to the "On" position, and retrieve the code. Most models also allow you to clear the check engine light, which is essential for verifying that a repair has been successful. They are affordable, durable, and an excellent starting point for any DIY mechanic.
The primary advantage of a basic scanner is its simplicity. It provides the single most critical piece of information—the trouble code—without unnecessary complexity. It transforms uncertainty into knowledge.
Bluetooth OBD-II Adapters
For users comfortable with smartphone technology, a Bluetooth OBD-II adapter offers a more modern and powerful diagnostic solution. These are compact devices that plug into the OBD-II port and establish a wireless connection to an application on your smartphone or tablet (compatible with both Android and iOS). This configuration transforms your mobile device into a highly capable diagnostic tool.
The application is where the advanced functionality resides. A well-designed app will not only read and clear codes but also provide access to a wealth of additional information:
- Live Data: You can monitor engine parameters in real-time, such as coolant temperature, RPMs, and fuel trim adjustments.
- Freeze Frame Data: This is a snapshot of your engine’s operating conditions at the exact moment the check engine light was triggered. It is invaluable for diagnosing complex or intermittent issues.
- Repair Suggestions: Many applications offer detailed explanations of the codes and may even provide links to common solutions or required parts for the repair.
This option provides significantly more data than a basic reader, making it ideal for the enthusiast who wants to understand why a code was set, not just what the code is.
To help you decide, here is a summary of the most common types of scanners available.
Comparing OBD-II Diagnostic Tools
| Tool Type | Best For | Typical Cost | Key Features |
|---|---|---|---|
| Basic Handheld Scanner | Quick, simple code retrieval and clearing without needing other devices. | $20 – $60 | All-in-one device, no apps needed, very easy to use. |
| Bluetooth Adapter | Tech-savvy users who want detailed live data and diagnostics on their smartphone. | $30 – $100+ | Wireless connectivity, access to live data, freeze frame info, app-based features. |
| Professional Scanner | Advanced DIY-ers and aspiring technicians needing deep system access. | $200 – $1000+ | Tests specific components, bidirectional controls, advanced system diagnostics. |
Ultimately, the best tool is the one that aligns with your technical comfort level. A basic reader is perfect for getting started, while a Bluetooth adapter offers a more comprehensive view for a modest additional investment.
How to Retrieve Codes From Your Vehicle
With your diagnostic tool selected, you are ready to interface with your vehicle's computer. This process involves connecting to your car's central processing unit to retrieve the stored trouble codes. It is a straightforward procedure that provides crucial diagnostic information.
First, you must locate the OBD-II port. As mandated in 1996, every passenger vehicle is equipped with one. In most vehicles, it is located under the dashboard on the driver's side, typically within a few feet of the steering column. Common locations include near the hood release lever or just above the pedals.
If the port is not immediately visible, look for a small plastic cover designed to blend in with the interior trim. If you cannot find it, a quick online search for your vehicle’s make and model (e.g., "Honda Accord OBD-II port location") will usually yield a diagram or image showing its precise location.
Connecting and Communicating with Your Car
Once you have located the port, you can connect the scanner. Ensure your vehicle's ignition is completely off before plugging in the tool. The 16-pin connector is trapezoidal and designed to fit in only one orientation, so do not force it.
With the tool securely connected, follow this sequence:
- Turn the Key: Insert your key into the ignition and turn it to the "On" or "Accessory" position. The dashboard lights should illuminate, but do not start the engine.
- Establish Communication: Your code reader will power on and begin communicating with your car’s main computer, known as the Engine Control Unit (ECU). If you are using a Bluetooth adapter, you will now open the corresponding app on your phone and follow the instructions to pair the device.
- Read the Codes: Once a connection is established, the scanner's menu will present several options. Select the option labeled "Read Codes," "DTCs," or a similar phrase.
This fundamental process is consistent whether you are using a basic handheld scanner or a professional-grade diagnostic interface.
While the tools may vary in appearance and features, the core process of connecting, powering on, and reading the code remains largely the same.
A Real-World Scenario: Retrieving a P0420 Code
Let's consider a common scenario. The check engine light appears in your Toyota Camry. You take your basic handheld scanner, connect it to the OBD-II port, and turn the key to the "On" position. The scanner powers up and, after a few moments, displays the code P0420.
This single code is a significant piece of diagnostic information. You have moved from a vague "engine problem" to a specific fault: "Catalyst System Efficiency Below Threshold (Bank 1)." This does not automatically mean you need a new catalytic converter, but it narrows the diagnostic possibilities from hundreds down to a manageable few.
The scanner has translated your vehicle's warning into actionable data. Instead of guessing, you can begin investigating the likely causes, such as a faulty oxygen sensor or an exhaust leak.
Of course, if you are not comfortable performing further diagnostics yourself, this code is the ideal information to provide to a professional. To understand how we utilize this initial clue to develop a complete repair strategy, learn more about our approach to car diagnostics in Plano.
Interpreting Diagnostic Trouble Codes
You have successfully retrieved a code from your vehicle's computer. However, a string of alphanumeric characters like "P0420" is not immediately instructive.
Learning to interpret these Diagnostic Trouble Codes (DTCs) is the next critical step. Every code follows a standardized structure that provides clues about the nature of the fault, the affected system, and its potential severity.
The Anatomy of a Trouble Code
A DTC may appear random, but each character has a specific meaning. Let’s dissect a common code, P0135, to understand its structure.
First Character (The Letter): This identifies the main system reporting the fault. 'P' is for Powertrain, which is the most common and includes the engine, transmission, and emissions systems. Other letters include 'B' for Body, 'C' for Chassis, or 'U' for network and communication issues.
Second Character (The Number): This is an important distinction. A '0' indicates a generic, or "global," code, meaning its definition is the same for all vehicle makes (Ford, Toyota, Chevrolet, etc.). A '1' signifies a manufacturer-specific code, which is unique to your vehicle's brand.
Third Character (The Number): This helps to identify the specific subsystem. For example, a '1' often relates to fuel and air metering, while a '4' typically points to the emissions control system.
Last Two Characters (The Numbers): These final two digits pinpoint the exact component or fault. In our example, P0135, the "35" specifies a "Heater Circuit Malfunction" for the Bank 1, Sensor 1 oxygen sensor.
With this knowledge, the code transforms from a confusing string into a precise diagnostic pointer.
Beyond the Code: Freeze Frame Data
Modern scanners, particularly Bluetooth models paired with smartphone apps, offer another layer of invaluable diagnostic information: freeze frame data. This is not just the code itself; it is a complete snapshot of the engine's operating parameters at the exact moment the fault was recorded.
Freeze frame data logs key metrics such as engine RPM, vehicle speed, coolant temperature, and fuel trim. This contextual information is analogous to having a witness at the scene, helping a technician understand the conditions under which the code was triggered.
This data is exceptionally useful for diagnosing intermittent problems that are not consistently present. For example, if a misfire code is set only when the engine is cold, the freeze frame data will show a low coolant temperature, providing the technician with a critical diagnostic clue.
With issues like faulty oxygen sensors and catalytic converter problems on the rise, understanding these codes is more important than ever. In 2023, the average check engine light repair cost increased to $424, a 5.1% increase from the previous year. A solid grasp of what DTCs mean allows you to make more informed decisions regarding your vehicle's maintenance. You can learn more about recent trends in vehicle repair costs.
Deciding Between a DIY Fix and Professional Repair
Retrieving the trouble code is an empowering first step. It transforms the ambiguous warning light into a tangible piece of information. However, identifying the code is only the beginning of the diagnostic process.
Some codes indicate problems that can be resolved with basic tools and minimal mechanical experience. A common example is an EVAP system code like P0457, which, despite sounding complex, often indicates that the gas cap is loose or faulty. Before assuming a major failure, always investigate the simplest potential causes. Tighten the cap, clear the code, and monitor if it returns.
The challenge is that most codes identify a symptom, not the root cause. For instance, a P0301 code indicates a misfire in Cylinder 1, but it does not explain why the misfire occurred. The actual cause could be a worn spark plug, a failing ignition coil, a clogged fuel injector, or a more serious internal engine issue.
When to Consult a Professional
This is where the expertise of an ASE-certified technician becomes invaluable. While your scanner provides the "what," our advanced diagnostic equipment helps us determine the "why." We can analyze live engine data and perform targeted tests to differentiate between a faulty sensor and a wiring issue causing the sensor to report incorrect data.
Simply clearing the code and hoping the problem resolves itself is inadvisable. The code will almost certainly reappear, and in the interim, the underlying issue could be causing progressive damage to expensive components like the catalytic converter.
Ignoring the light is a significant risk, yet a surprising number of drivers do so. Research on driver responses to check engine lights from early 2021 revealed that only 36.1% of drivers have the light inspected within the first week. Furthermore, 25% admitted to ignoring it completely.
Knowing when to seek professional assistance can save significant time, money, and frustration. If the solution is not obvious or the code points to a critical system, consulting a trusted repair facility is the most prudent course of action. You can learn more about our approach in our guide to professional engine diagnostics in Plano.
Common Questions About Check Engine Codes
After retrieving a code, it is natural to have questions about the next steps. Understanding the implications of the code can help you decide whether to attempt a DIY repair or seek professional service.
Here are answers to some of the most frequently asked questions about check engine codes.
Can I Drive My Car with the Check Engine Light On?
The answer depends entirely on the behavior of the light: whether it is steady or flashing.
Steady Light: If the light is solid and not blinking, it is generally safe to continue driving. Consider it a notification that your vehicle requires attention soon. Do not ignore it, but you do not need to stop immediately. Schedule an inspection within the next few days.
Flashing Light: This is an urgent warning. A flashing light means you should pull over safely and turn off the engine as soon as possible. It indicates a severe engine misfire that can destroy your catalytic converter within a few miles of driving—a repair that can easily exceed $1,000.
A steady light is a warning. A flashing light is an emergency. Remembering this distinction can prevent a catastrophic and costly repair.
Will the Light Turn Off by Itself After a Repair?
In some cases, yes. For minor issues, such as a loose gas cap, the light will typically extinguish on its own after several drive cycles. The vehicle's computer must complete its self-diagnostic tests and confirm the problem has been resolved.
For most repairs, however, the code must be cleared manually using an OBD-II scanner. A professional technician will perform this as a final step to reset the system. This also serves to confirm that the repair was successful and that the light does not immediately return.
What if My Scanner Shows Multiple Codes?
Discovering a long list of codes can be alarming, but it rarely indicates that your vehicle has numerous independent failures. More often, a single faulty component creates a domino effect, triggering a cascade of related trouble codes in other systems.
This is a situation where professional diagnosis is highly beneficial. An experienced technician will not simply replace parts corresponding to each code. Instead, they will analyze the complete picture, including freeze frame data, and conduct specific tests to identify the single root cause. This approach ensures a precise, cost-effective repair rather than an expensive process of trial and error.
Do not allow a simple warning light to escalate into a major repair. If you require a clear diagnosis and expert advice, the ASE-certified team at Express Lube & Car Care is here to assist drivers in the Plano area. Visit us for a professional diagnostic service that will pinpoint the true cause of the problem and return you to the road with confidence. Learn more at https://www.expresslubeplano.com.